How to Add Shading When Stenciling
Say goodbye to flat florals! In this tutorial, I’m sharing my favorite tips for adding depth and wow-factor when stenciling!
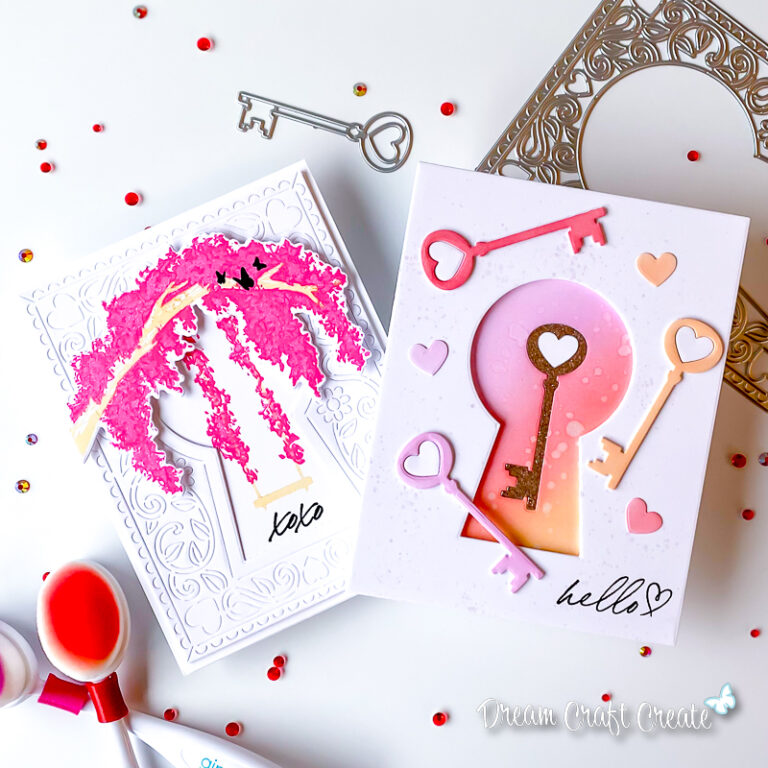
If you love the ease of stenciling but wish your results had a little more depth and realism, this one’s for you! In today’s video, I’m sharing how to add simple shading when using stencils to create dimensional blooms that practically jump off the page.
I used the Dancing Cosmos stencils from Altenew to build this dreamy purple floral card, and I’ll walk you through exactly how I approached color placement, pressure, and layering for a soft, shaded effect—no extra products required!

Disclosure
Compensated affiliate links may be used in this post at no cost to you. I received some of the products in this post at no cost. I will ONLY show you products from companies that I believe in and purchase from personally. Thank you for supporting me so that I can continue to bring you lots of fun crafting content!
In the video, you’ll learn:
- Practical tools for ink layering soft shadows
- My go-to approach for flower petal shading with minimal effort
- How to keep stenciled images clean and crisp
- Tips for grounding your stenciled design with balanced sentiment placement and finishing touches
Whether you’re a stencil pro or just starting out, these tips will help you get more out of your layering stencils—and achieve results that look dimensional, polished, and wow-worthy.
Have you tried shading with stencils before? Let me know in the comments, or tag me @dreamcraftcreate if you give this look a try. I’d love to see your bold blooms!
Happy crafting, and I’ll see you in the next video!
Supplies