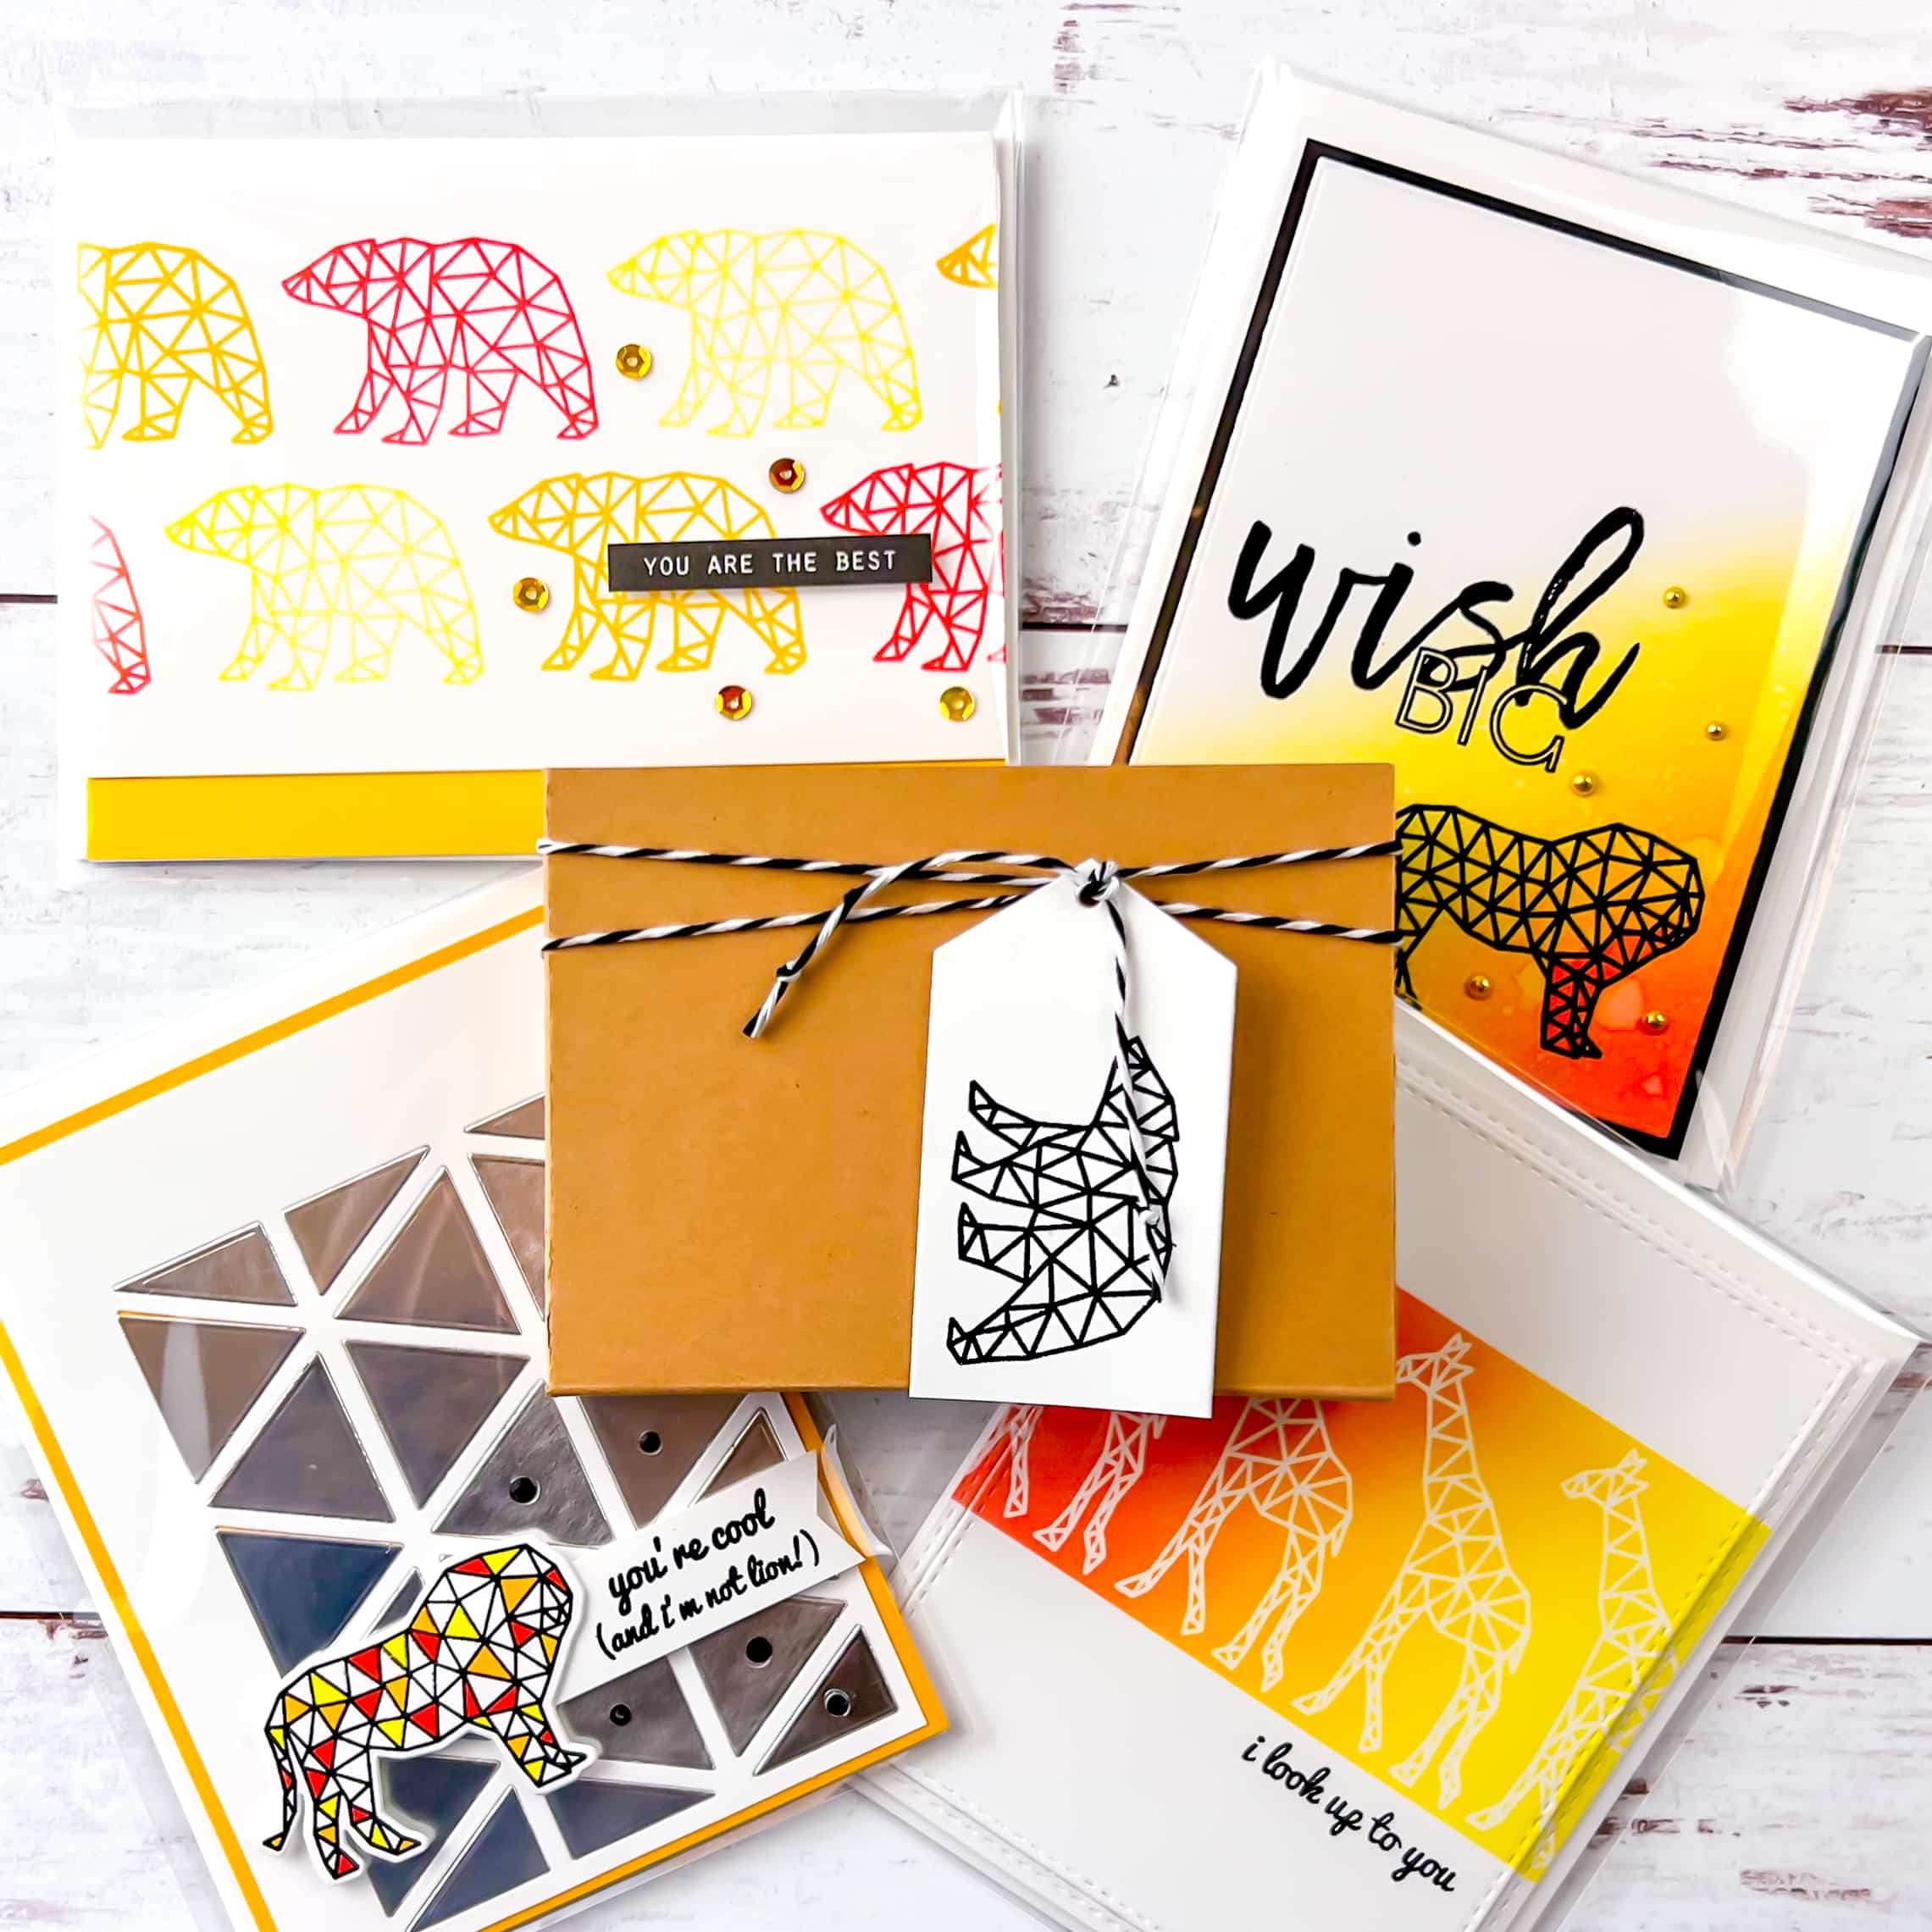
One Stamp Set Four Ways – A Gift Card Set for Him!
Learn how to create FOUR cards using ONE stamp set!
For my final level one challenge of the Altenew Educator Certification Program, I created two gift card sets — one for her and one for him! I posted my gift card set for her earlier in the week here. The sets I created highlight three components from the level one classes I have taken. I chose to highlight the following components:
- Metallic paper technique, Let It Shine Online Cardmaking Class
- Stamped background technique, Clean & Simple Boutique Cards Online Cardmaking Class
- Emboss resist and faux watercolor technique, Easy Ink Blending Techniques Online Cardmaking Class
Check out my video tutorial below and learn how to make this gorgeous gift card set for him!
Disclosure
Compensated affiliate links may be used in this post at no cost to you. I received some of the products at no cost. I will ONLY show you products from companies that I believe in and purchase from personally. Thank you for supporting me so that I can continue to bring you lots of fun crafting content!
Featured Products
- Altenew Geometric Menagerie Stamp Set
- Altenew Best Sentiments Stamp Set
- Altenew Wish Big Stamp Set
- Altenew Triangle Madness Die Set
- For the full supply list, scroll down to the thumbnails at the end of this post.
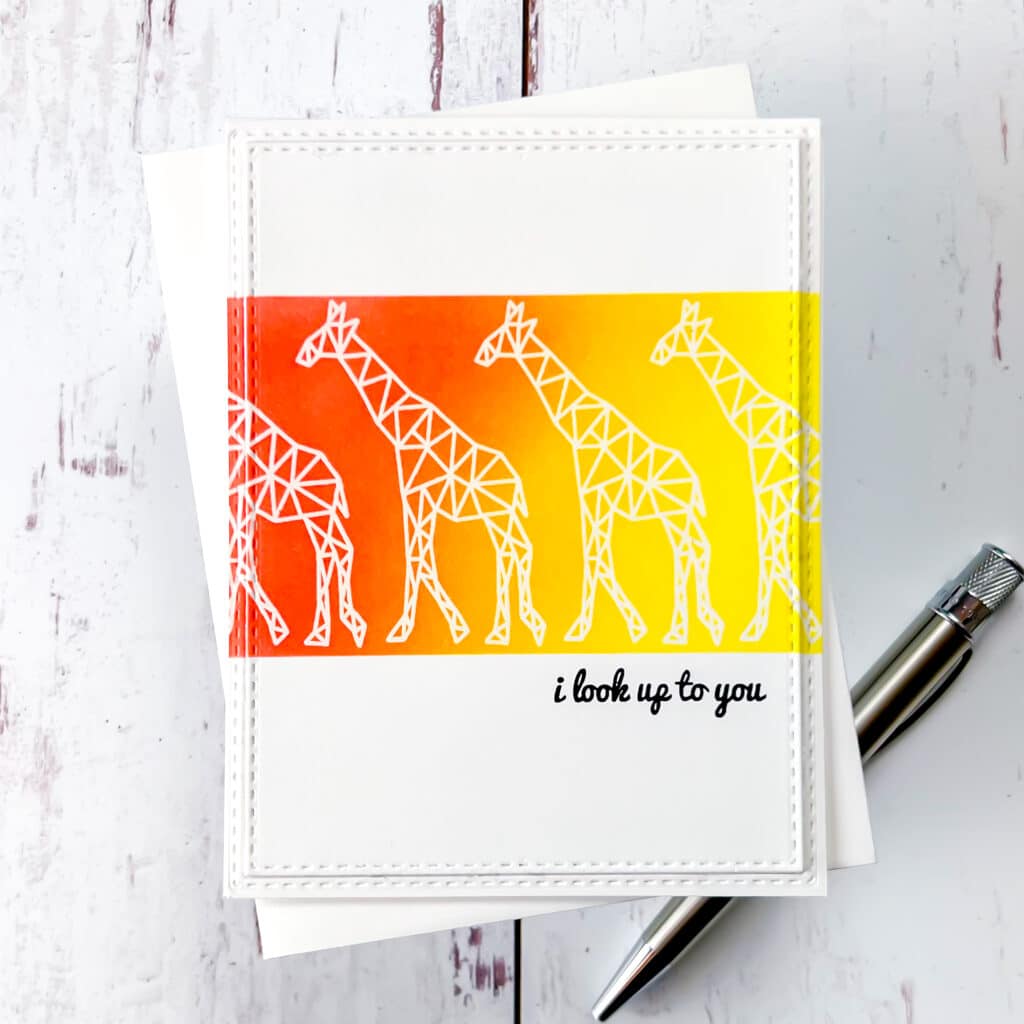
Card One
I created a repeating line of giraffes on the front of my first card using one of the stamps from the Geometric Menagerie Stamp Set. I stamped the giraffe using embossing ink and heat embossed the images using clear embossing powder. Next, I used post-it tape to mask off above and below the giraffes. I then used the emboss resist technique by ink blending over the top of the giraffes with yellow, orange, and red inks on the diagonal. After removing the post-it tape, I stamped a sentiment from the same set in black pigment ink.
I used a modified version of the eclipse technique to create some dimension on an otherwise simple card. First, I die cut the panel using a double stitched rectangle die and glued the outer border to my card base. Next, I glued two additional layers behind the center portion. I then glued the center portion on the inside of the border piece. This made it so the center portion popped out from the card. A fun way to add a little wow your cards!
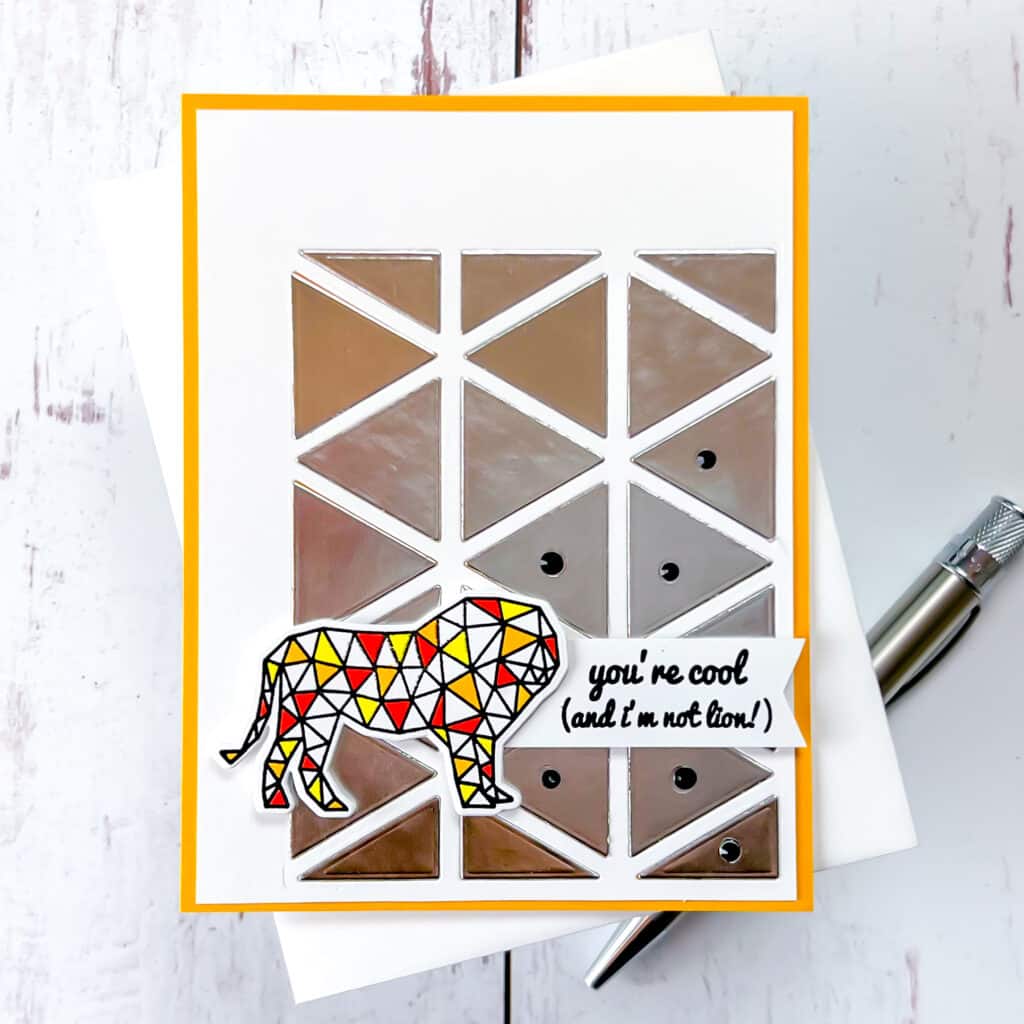
Card Two
First, I die cut my card panel using one of the dies from the Triangle Madness Die Set. I then added some double-sided adhesive to the back of the panel. I separately die cut the same die using silver metallic cardstock. I then inlaid the silver triangles into the white panel. Love the shine this creates!
I decided to use the lion stamp from the Geometric Menagerie Stamp Set for this fun card. I first stamped the stamp in alcohol marker friendly ink. I then colored random portions of the stamped image using alcohol markers. Next, I stamped out my sentiment using a stamp from the same set.
I put the card together using foam squares behind the lion and the sentiment. I added a few black gems because guys like bling too!
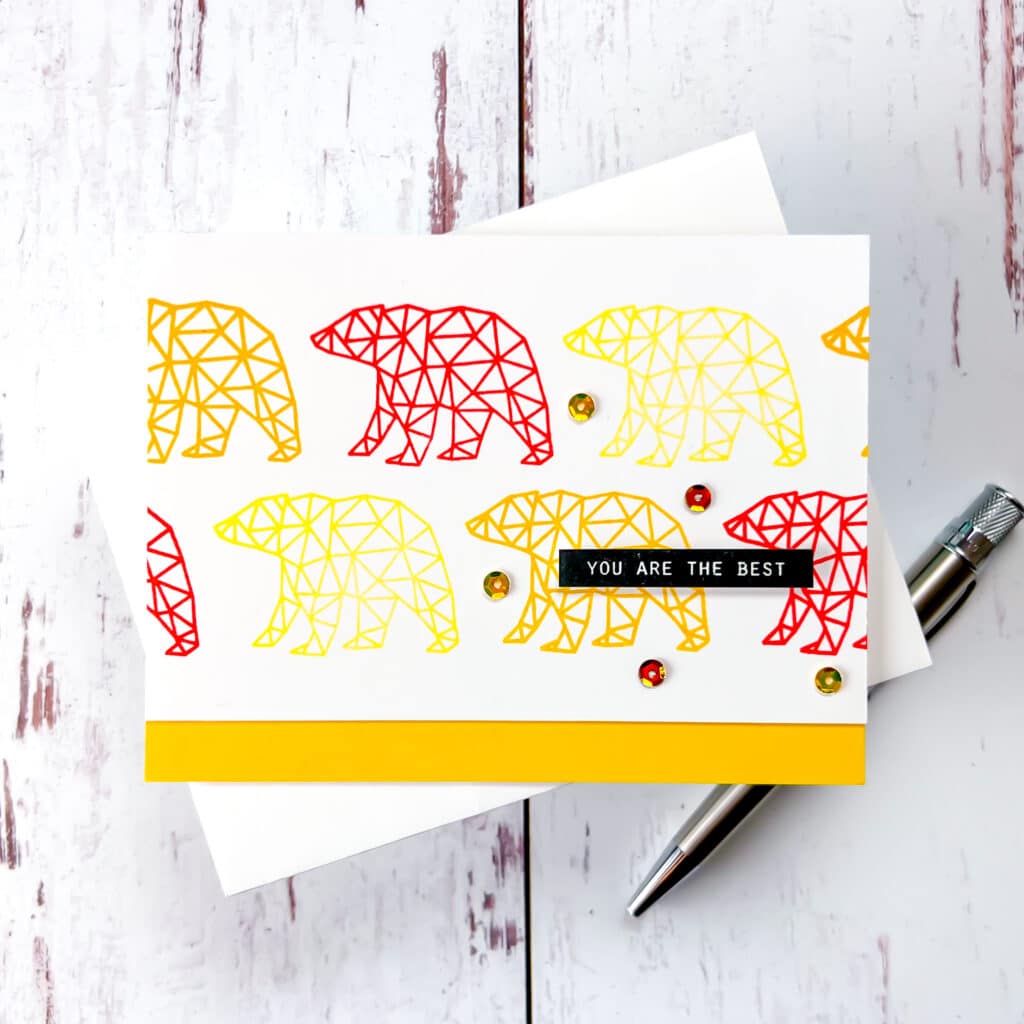
Card Three
For my third card, I stamped out a repeating pattern of the bear stamp from the Geometric Menagerie Stamp Set. I alternated my ink color using yellow, orange, and red ink. Then I glued a yellow piece of cardstock to my card base. Next, I cut down my stamped panel and adhered it to the card base.
I stamped my sentiment in black pigment ink using the Best Sentiments Stamp Set, trimmed it down, and adhered it to the front of the card using foam squares. To create a little more interest, I also added a few yellow sequins. Too cute!
Card Four
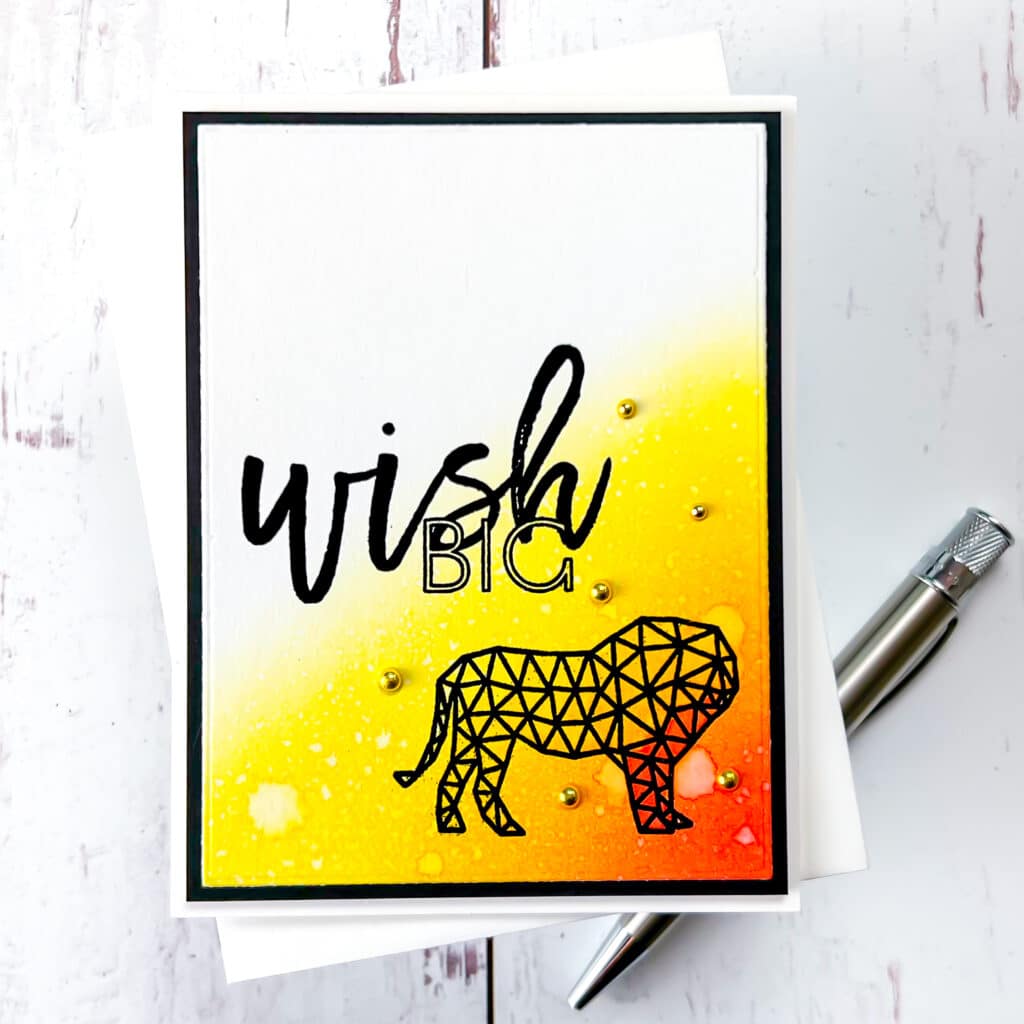
First, I ink blended yellow, orange, and red ink on the diagonal from the bottom right corner of a piece of watercolor cardstock. Once the ink was completely dry, I stamped the lion from the Geometric Menagerie Stamp Set, and the sentiment from the Wish Big Stamp Set, on the card using clear embossing ink. I then heat embossed everything using black embossing powder.
To create a faux watercolor look, I sprayed the panel a few times with water. I then used the same ink colors with a paintbrush and a little water to watercolor the inside of the lion. Love this effect!
I cut down the card panel once it was fully dry and adhered it to a piece of black cardstock. I then popped up the panel on my card base using craft foam. Lastly, I added a few shiny gold baubles to compliment the warm tones of the ink. So pretty!
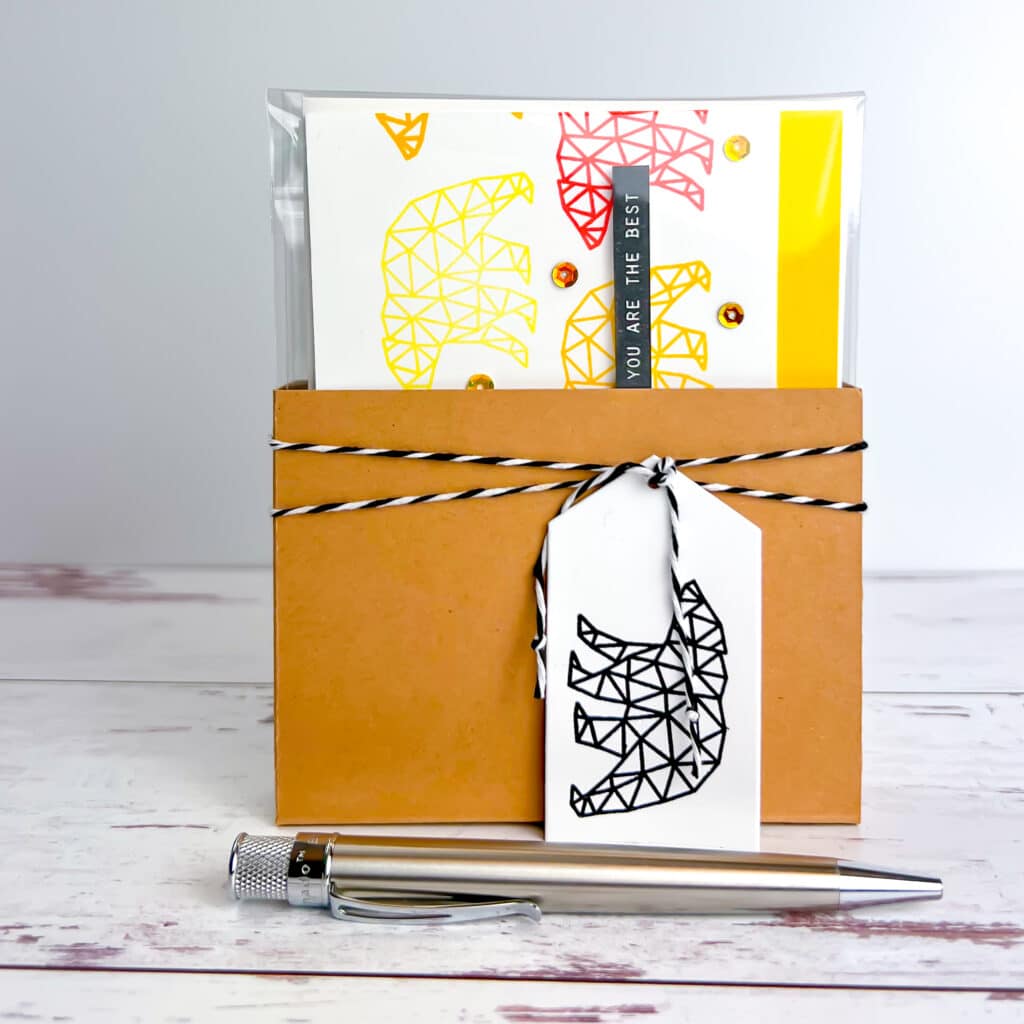
Gift Packaging
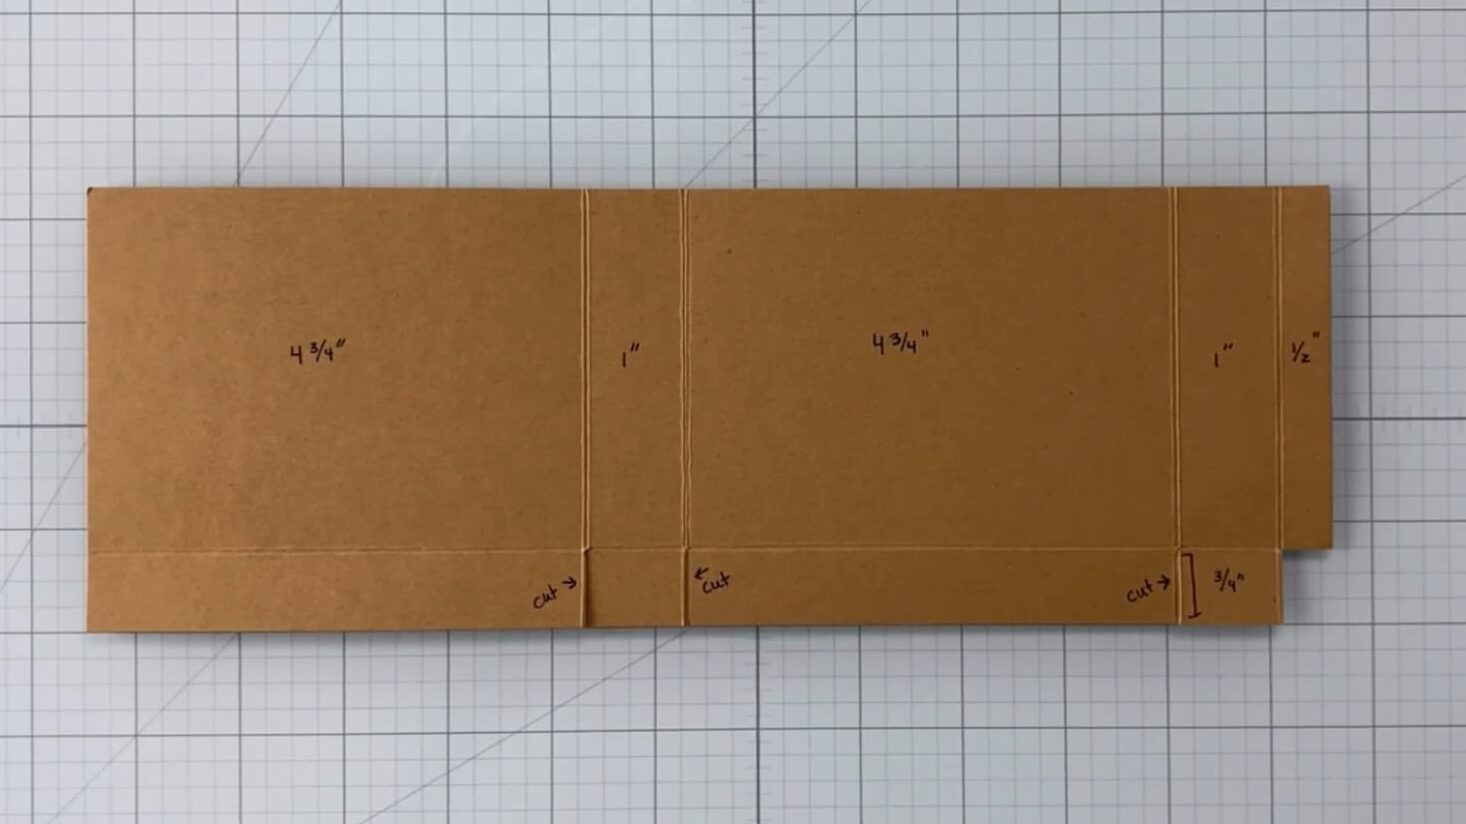
If you are anything like me, you receive a fair number of crafty goodies delivered to your home. I like to try and reuse parts of the packaging when I am crafting. So, to create packaging for my gift card set, I found a piece of heavy duty paper that I could cut down and create a box from. Here is an image with the measurements I used:
I put each of my cards in a resealable cello bag with a blank envelope. I then decorated my packaging using black and white twine. I also heat embossed the bear image onto a tag using black embossing powder. Be sure to watch the end of the for her video tutorial to see how I put the packaging together!
Supplies
These are absolutely BRILLIANT!! You have done an incredible job coming up with the two sets. I am blown away. Bravo!
Thank you so much! I really had fun with the masculine set. First time doing something like this and I was so happy with the result!