Negative Masking with Altenew’s New Release
Get Wow Results with Negative Masking!
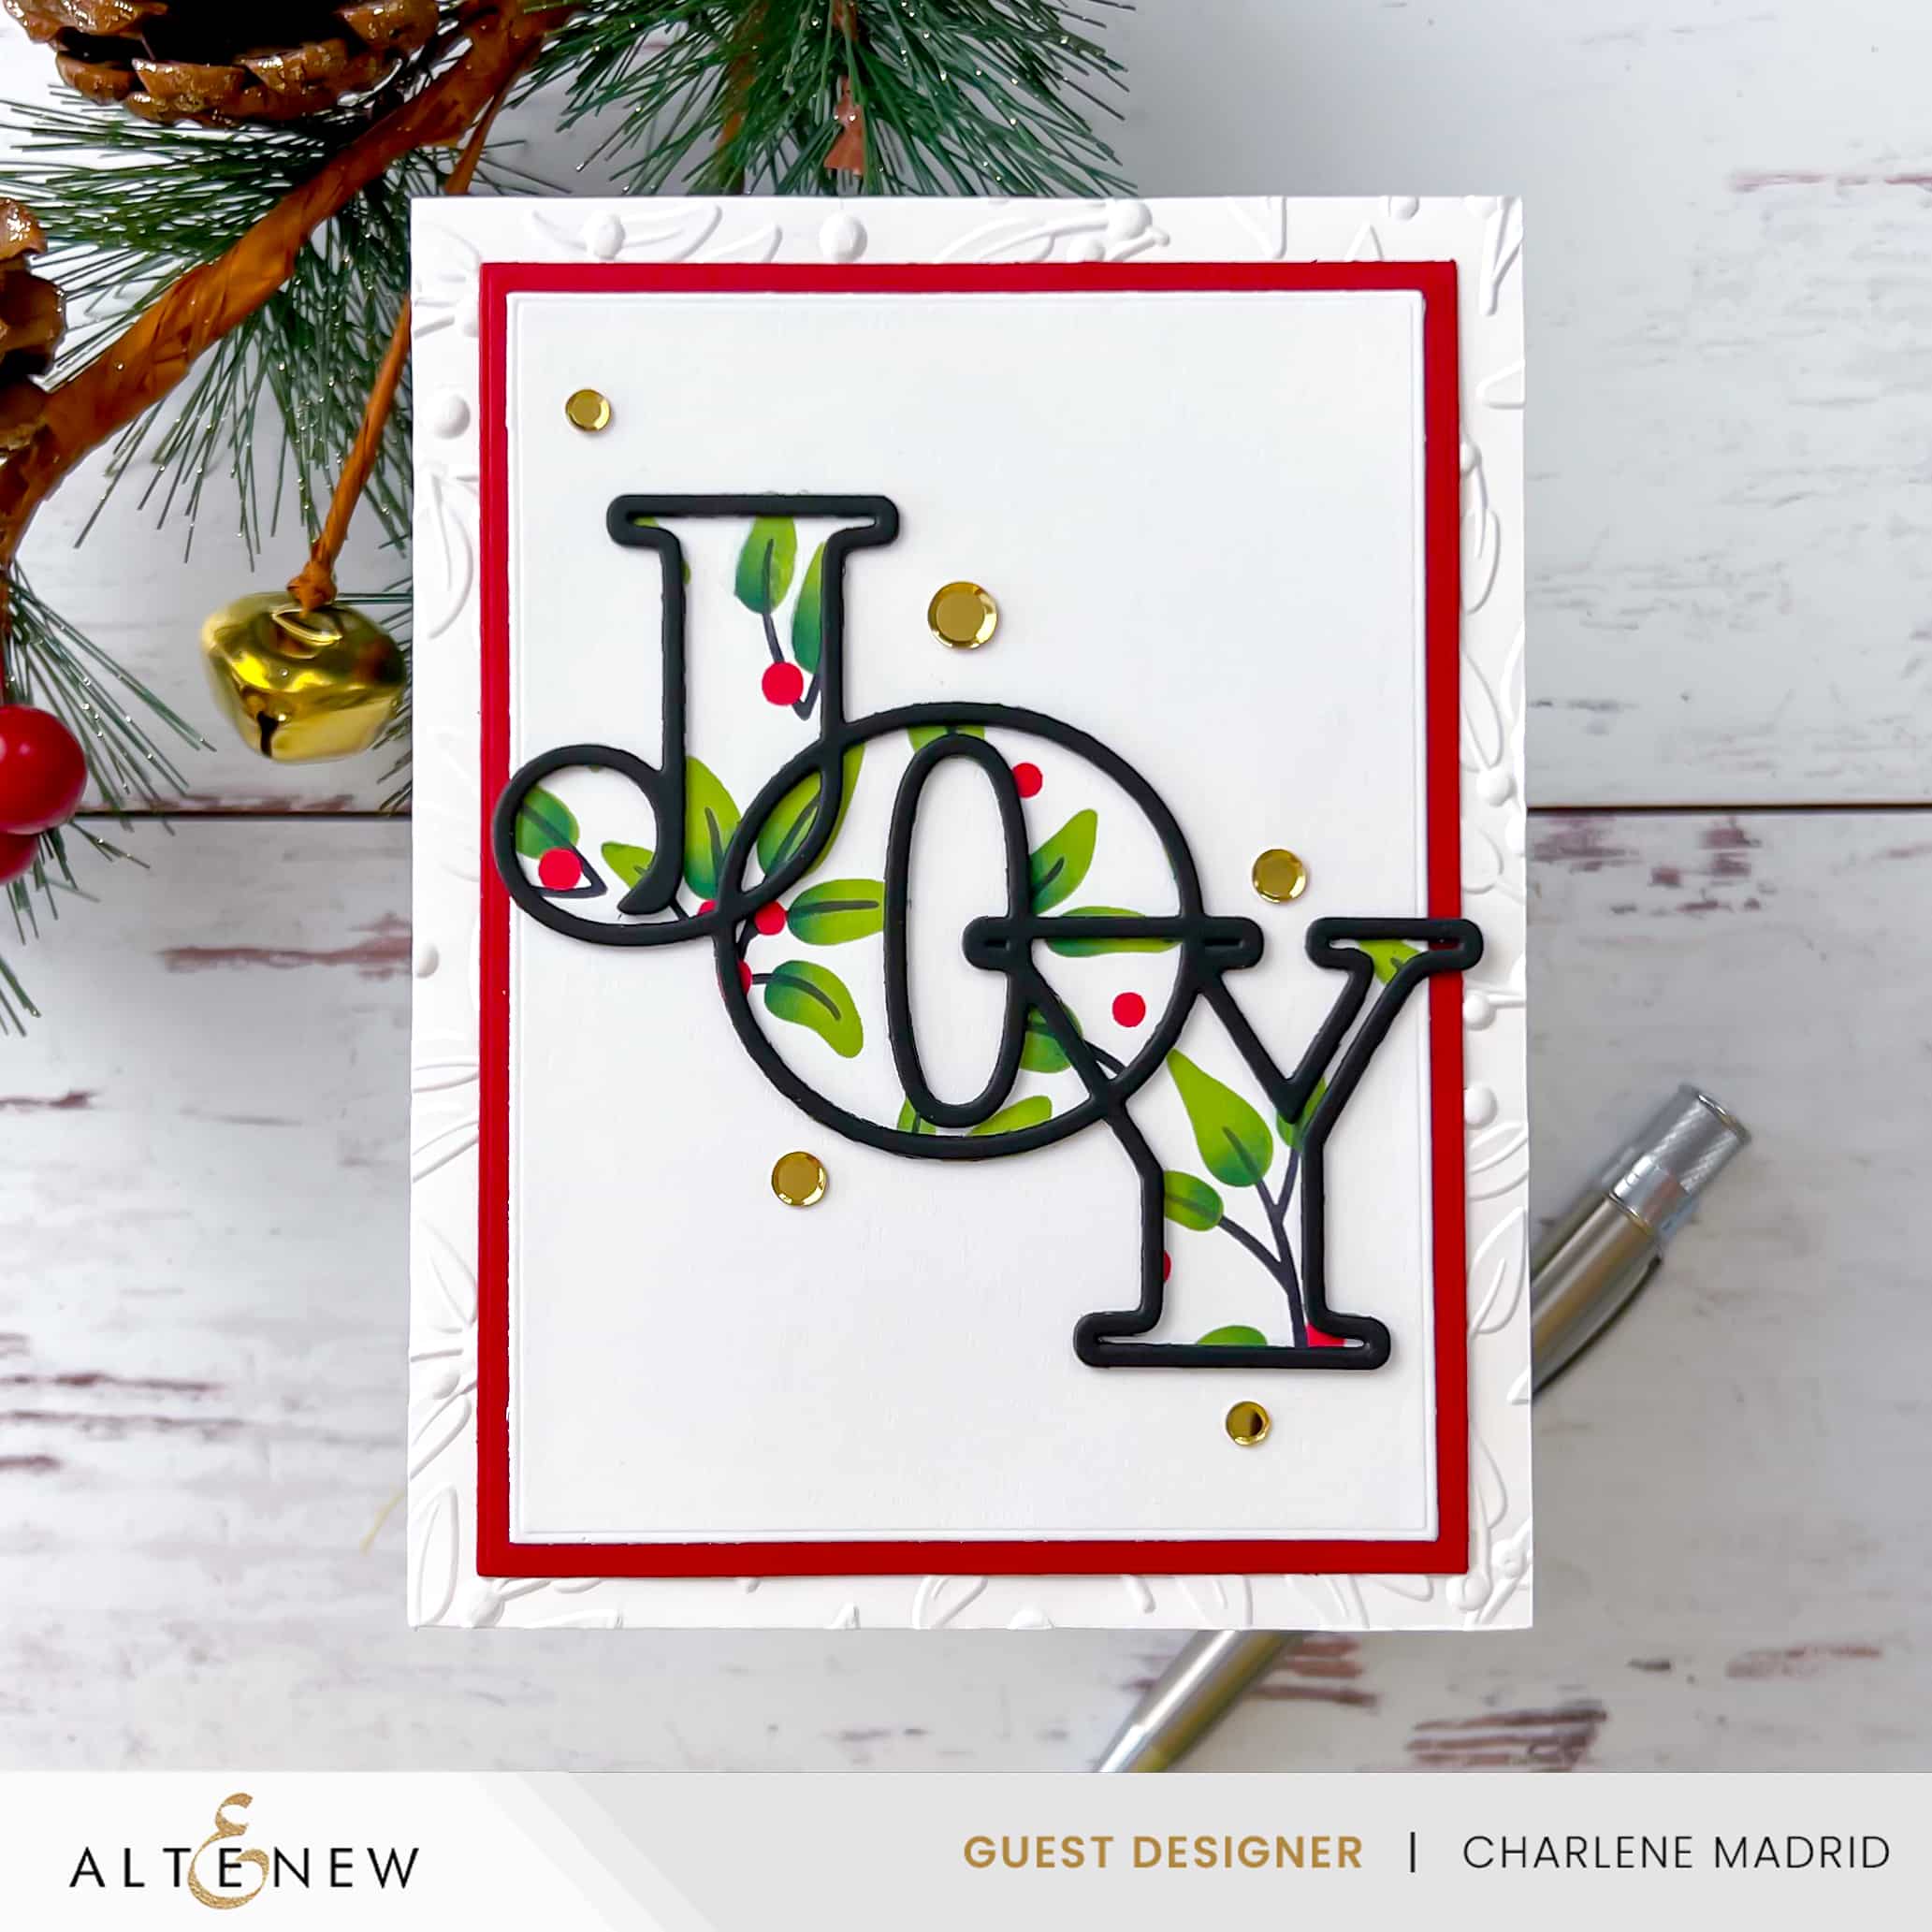
Greetings, fellow crafting enthusiasts! I’m thrilled to be back with another exciting crafting project featuring Altenew’s latest release for October 2023. Today, we’re diving into the world of negative masking—a technique I recently explored in the Masking Unleashed Online Cardmaking Class by Altenew. With this newfound knowledge, I couldn’t wait to try it out using the brand-new Joy Die Set, Festive Greenery Builder Stencil Set, and the stunning Botanical 3D Embossing Folder.
But before we get started, let me show you the step-by-step process in action. Check out my video tutorial below:
Disclosure
Compensated affiliate links may be used in this post at no cost to you. I received some of the products in this post at no cost. I will ONLY show you products from companies that I believe in and purchase from personally. Thank you for supporting me so that I can continue to bring you lots of fun crafting content!
Featured Products
- Joy Die Set
- Festive Greenery Builder Stencil Set
- Botanical 3D Embossing Folder
- For the full supply list, scroll down to the thumbnails at the end of this post.

Now, let’s gather our supplies and dive into the crafting adventure!
To kick things off, I employed the technique of negative masking. Using the Joy Die Set, I carefully die-cut the outline word “joy” from the center of an A2-sized sheet of masking paper. After removing the backing, I applied the negative portion of the mask to an A2-sized piece of cardstock.
With the masking paper in place, I reached for the Festive Greenery Builder Stencil Set. This versatile set allowed me to ink blend green leaves and vibrant red berries directly onto the cardstock, filling the space where the letters of “joy” would typically be. The result? A beautiful and intricate holiday-themed background.
To make the sentiment “joy” stand out, I die-cut three of the outline word from black cardstock. Using liquid glue, I layered these die cuts to create a bold, dimensional word that would take center stage on the card.
For the background, I turned to the Botanical 3D Embossing Folder. This exquisite folder features the same holiday berry and leaf pattern as the stencil set. Using double-sided tape, I adhered the embossed panel to a card base.
To add a touch of elegance, I glued a piece of red cardstock as a mat, creating a small red border around my “joy” stenciled piece. Then, using double-sided tape, I attached the finished “joy” panel to the embossed background.
No card is complete without a bit of sparkle, right? I added a few pieces of gold confetti for that extra festive touch!

Tip
While I used the Festive Greenery Builder Stencil Set for the leafy background, you can try a different approach by using ink blending to create a gradient effect inside the negative space of the word’s outline. This variation offers a versatile way to add dimension and color to your cards, and it’s a great option if you don’t have stencils on hand. Give it a try and see how it transforms your card designs!
Supplies

What a beautiful card! I love how you used masking to ink blend the leafy background inside of your die cut letters 🙂
Thank you! 🙂
I LOVE THIS!!
Thanks, Erum! 💕