New Release from Picket Fence Studios September 2023
Holiday fun with the new Picket Fence Studios release!
Hi friends! As the holiday season approaches, what better way to get into the spirit than by diving into the enchanting September 2023 release from Picket Fence Studios? This holiday-focused collection is brimming with stamps, dies, and stencils that will infuse your creations with festive magic. I’ve been busy crafting five delightful cards that showcase the creative possibilities this release offers. Join me on this holiday crafting journey!
Disclosure
Compensated affiliate links may be used on this page at no cost to you. Thank you for supporting me so that I can continue to bring you lots of fun crafting content!
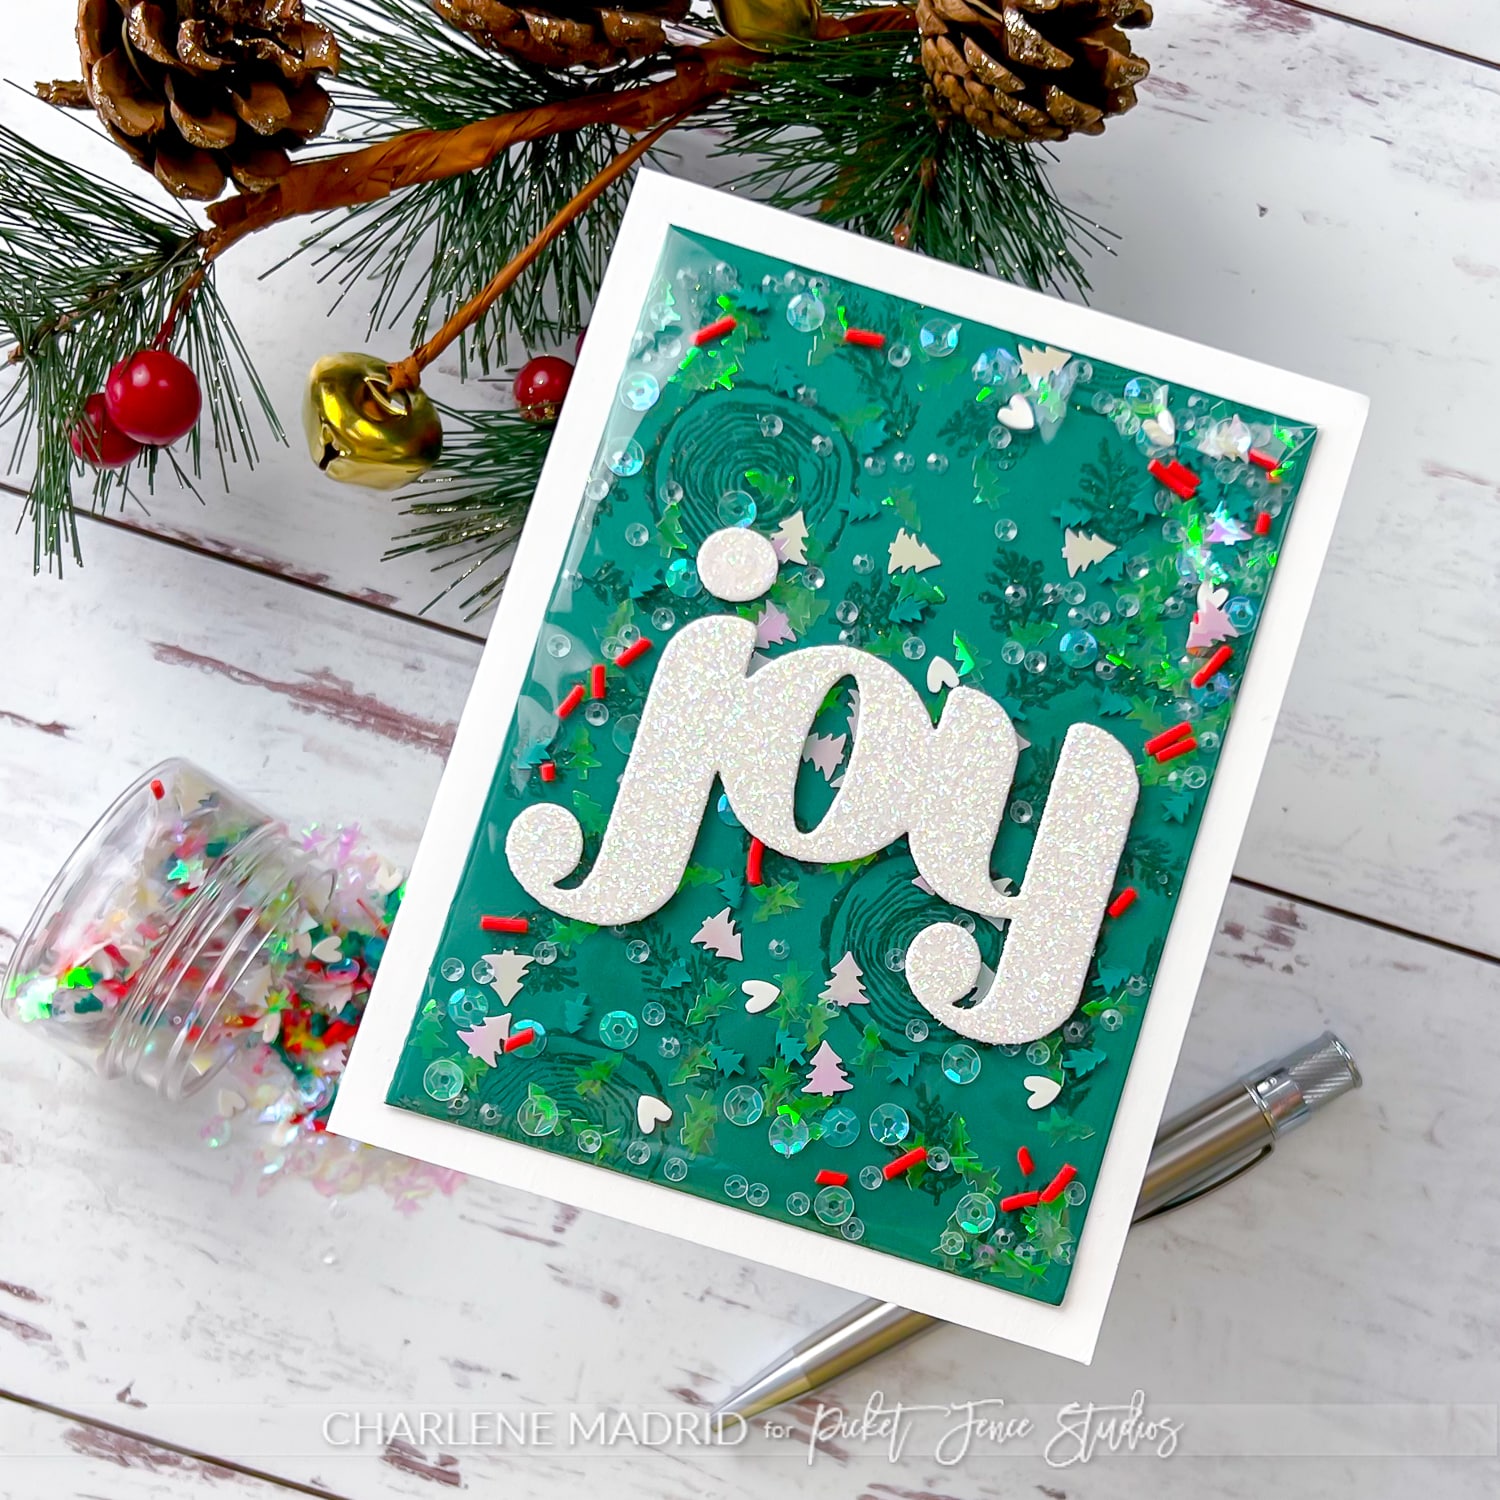
Card 1: Fun Forest Shaker
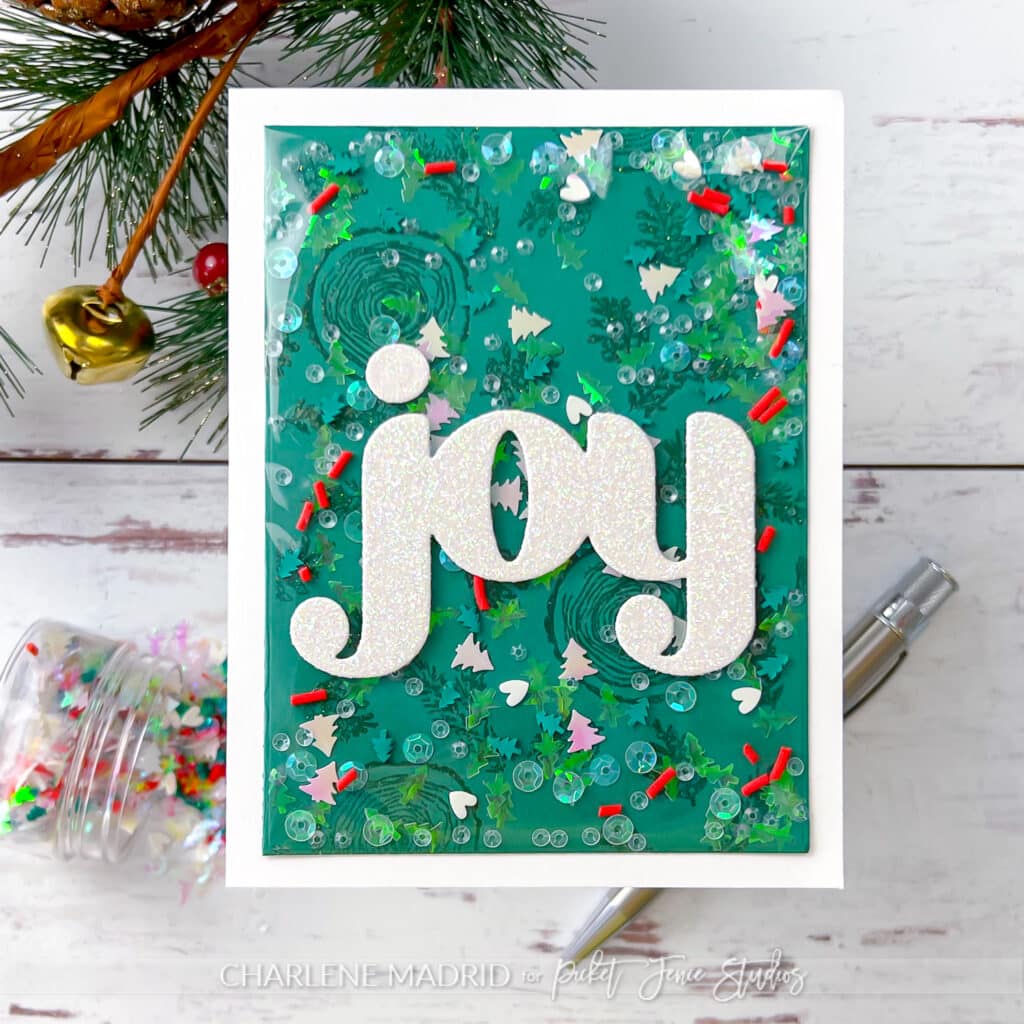
For my first card, I used the A Forest Walk Seamless Stamp to create a mesmerizing background. Stamping with clear embossing ink and heat embossing with clear glitter embossing powder on green cardstock, I achieved a winter wonderland effect. To create a unique flat-front shaker element, I employed Shaker Sheets, filling my shaker pocket with the delightful Mrs. Claus Embellishments, featuring iridescent white, green, and clear Christmas trees, along with iridescent clear sequins, green clay Christmas trees, and red clay sprinkles. To top it off, the elegant Joy Word Die cut from white glitter paper adds a touch of sparkle to the front.
Products Used
Card 2: Mistletoe Magic
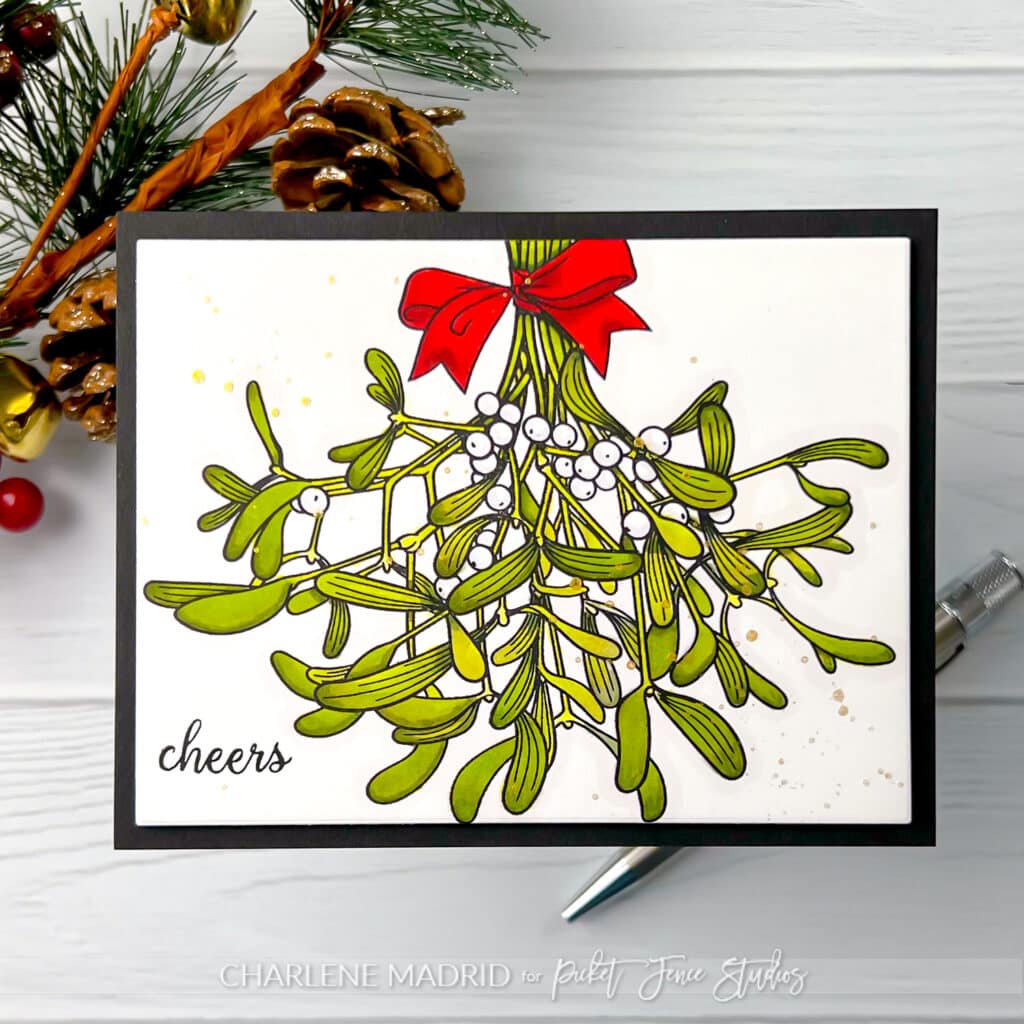
For the second card, I stamped a stunning large mistletoe bunch from the Mistletoe Kisses Stamps onto white cardstock. Coloring it with alcohol markers, I brought out the vibrant greens of the mistletoe. To add a touch of elegance, I incorporated Gold Paper Splatter, creating beautiful gold splatters across the card front. This card is the perfect representation of holiday charm.
Products Used
Olo Marker Colors
- Leaves: YG 2.1, YG 2.5, YG 8.3, YG 8.7
- Ribbon: R 0.5, R 0.6, R 1.7
- Berries/Shading: C-G 1, C-G 0
Card 3: Sweet Santa Gnome

The third card features the adorable Santa gnome from the Merry Good Gnome Stamps. After coloring it with alcohol markers and cutting it out with the coordinating die, I set it against a background that radiates holiday splendor. Using a toner card front from the Rustic Christmas Toner Card Fronts, I applied gold foil using my Mini Minc Machine. Placing the Santa Gnome at the forefront, along with a sentiment from the same stamp set, this card embodies the festive spirit.
Products Used
Olo Marker Colors
- Beard: W-G 0, W-G 1, W-G 3
- Tree: YG 8.5, YG 8.7, R-G 5, R-G 6
- Nose: OR 1.1, OR 2.2
- Shoes: OR 3.7, OR 3.8
- Hat/Coat: R 1.7, R 1.8, C-G 0, C-G 1
- Ornaments: BG 2.3, BG 2.4, B 2.2, B 2.4, B 0.5, B 0.6, C-G 3
Card 4: Vintage Winter Wonderland

For card number four, I created a winter scene with a 60s vintage twist. I die-cut two pine trees using the A2 Giant Christmas Tree Die from white cardstock. Adding color with Paper Pouncers, I used mint and aqua ink to create a vintage vibe. The background, adorned with the Reindeer Games Stencil featuring pixelated rows of reindeer, is a playful nod to the holiday season. Alternating lines of mint and aqua ink on the stencil added an extra layer of charm. I finished the card with iridescent white snowflakes and sequins from the Christmas Flurries Embellishments.
Products Used
- A2 Giant Christmas Tree Die
- Reindeer Games Stencil
- Christmas Flurries Embellishments
- Rainbow Paper Pouncers
Ink Colors
- Catherine Pooler Minted
- Catherine Pooler Cummerbund
Card 5: Snowy Snowman Village
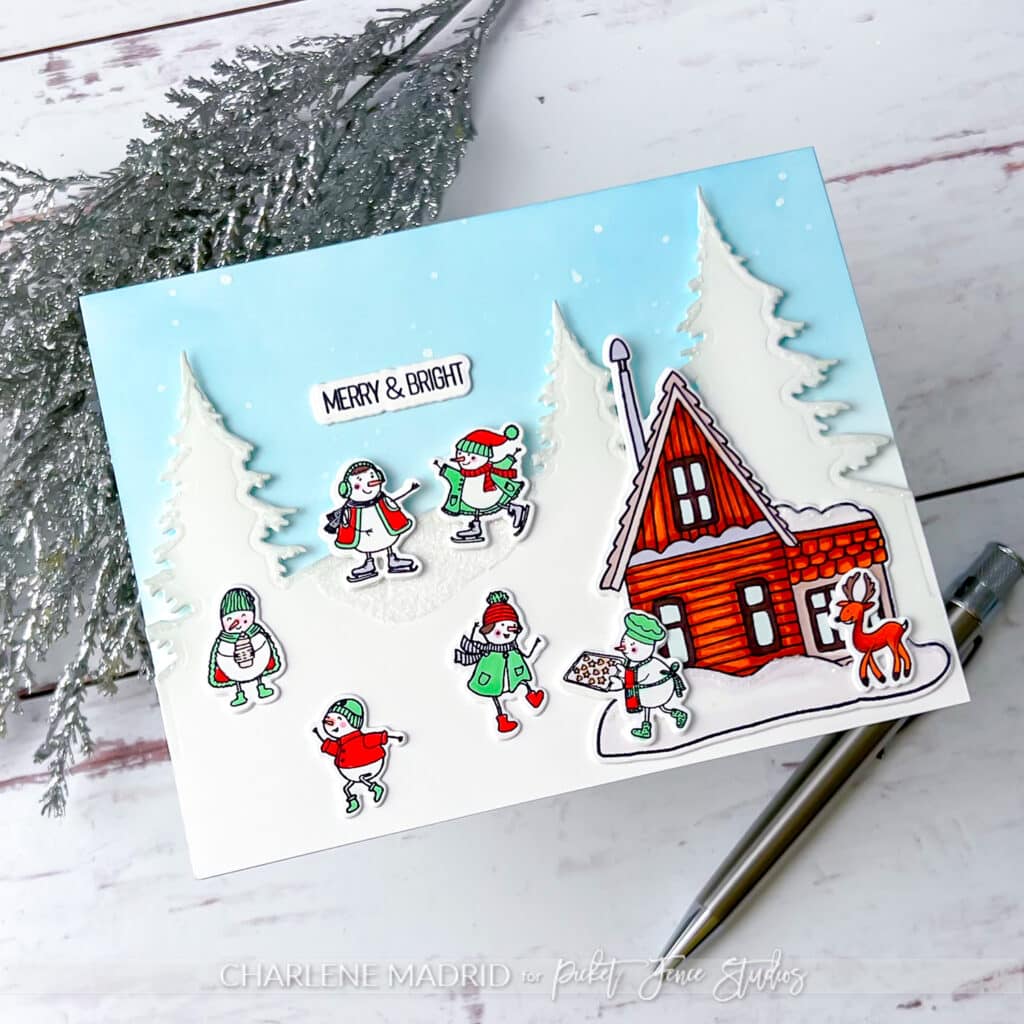
The fifth card transports us to a serene snowy village. I stamped several snowmen and a cozy cabin from the Snowman Village Stamps. Coloring each image with alcohol markers and cutting them out using the coordinating dies, I brought these characters to life. The background, a soft blue sky with splatters of Picket Fence Distress Spray, sets the wintery scene. Using the A2 Evergreen on a Hill Cover Plate Die, I created a snowy hill with pine trees, adding a layer of charm. A sprinkle of Distress Rock Candy Glitter gave the trees a snowy appearance. Placing the snowmen and cabin strategically, including some on an icy pond created with glitter and glue, completed this idyllic winter village scene.
Products Used
Ink Colors
- Simon Says Stamp Pawsitively Saturated Ink Marine
- Simon Says Stamp Pawsitively Saturated Ink Flannel