NEW Craft Your Life Project Kit: Quick and Easy Die Cutting with Altenew
The Zero-Waste Flowery Pattern makes die cutting effortless!
Crafting becomes a breeze with the Altenew Craft Your Life Project Kit: Zero-Waste Flowery Pattern. July’s kit features an innovative multi-image die that drastically simplifies the process of cutting out multiple different images. Discover how this game-changing die enhances your crafting experience and watch as I create two very different cards using this remarkable kit.
July’s Craft Your Life Project Kit: Zero-Waste Flowery Pattern will be open to new subscribers until July 3rd at 5pm EST. If you love the look of die cut images, but struggle with cutting out all of the tiny pieces, then you do not want to miss this kit.
Be sure to check out my video tutorial below! In the tutorial, I walk you through each step of the card-making process, from stamping and die-cutting to stenciling and design. Whether you’re a beginner or an experienced crafter, this kit simplifies the process of cutting out multiple different images, enabling you to create with ease. Happy crafting!
Disclosure
Compensated affiliate links may be used in this post at no cost to you. I received some of the products in this post at no cost. I will ONLY show you products from companies that I believe in and purchase from personally. Thank you for supporting me so that I can continue to bring you lots of fun crafting content!
Featured Products
- Altenew Craft Your Life Project Kit: Zero-Waste Flowery Pattern
- For the full supply list, scroll down to the thumbnails at the end of this post.
Card 1: Beautiful Backgrounds
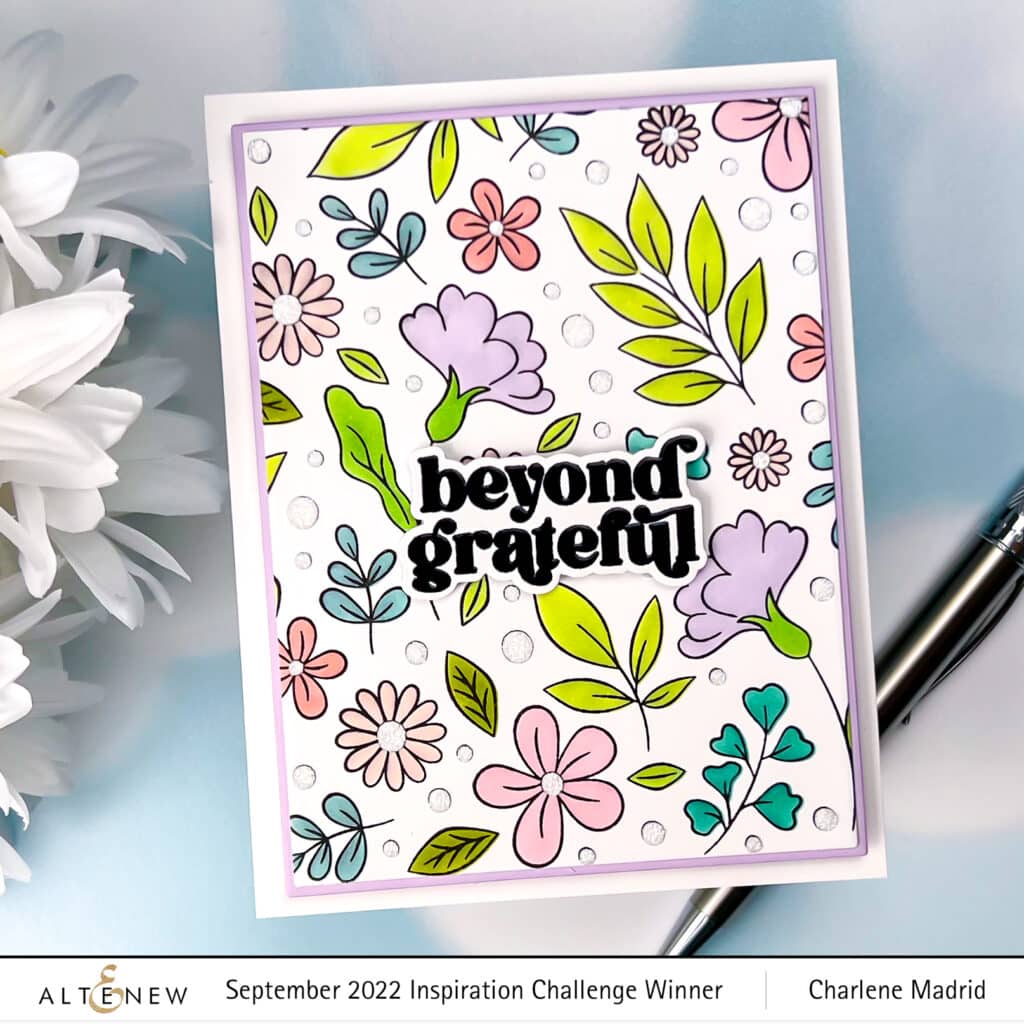
First, I stamped the Zero-Waste Flowery Pattern in black ink on white cardstock. I then colored in all of the images using the coordinating layering stencils. This makes applying lots of different colors so easy!
Next, I added some opaque texture paste to the final detail layer. This added some fun dimension and sparkle to the card. Once the paste was dry, I cut down the card panel and glued it to a slightly larger panel of lilac cardstock. I then popped the finished panel up using some foam strips.
To finish things off, I added a heat embossed sentiment to the front of the card. Since the texture paste is very sparkly, I did not need to add any sequins. Love it!
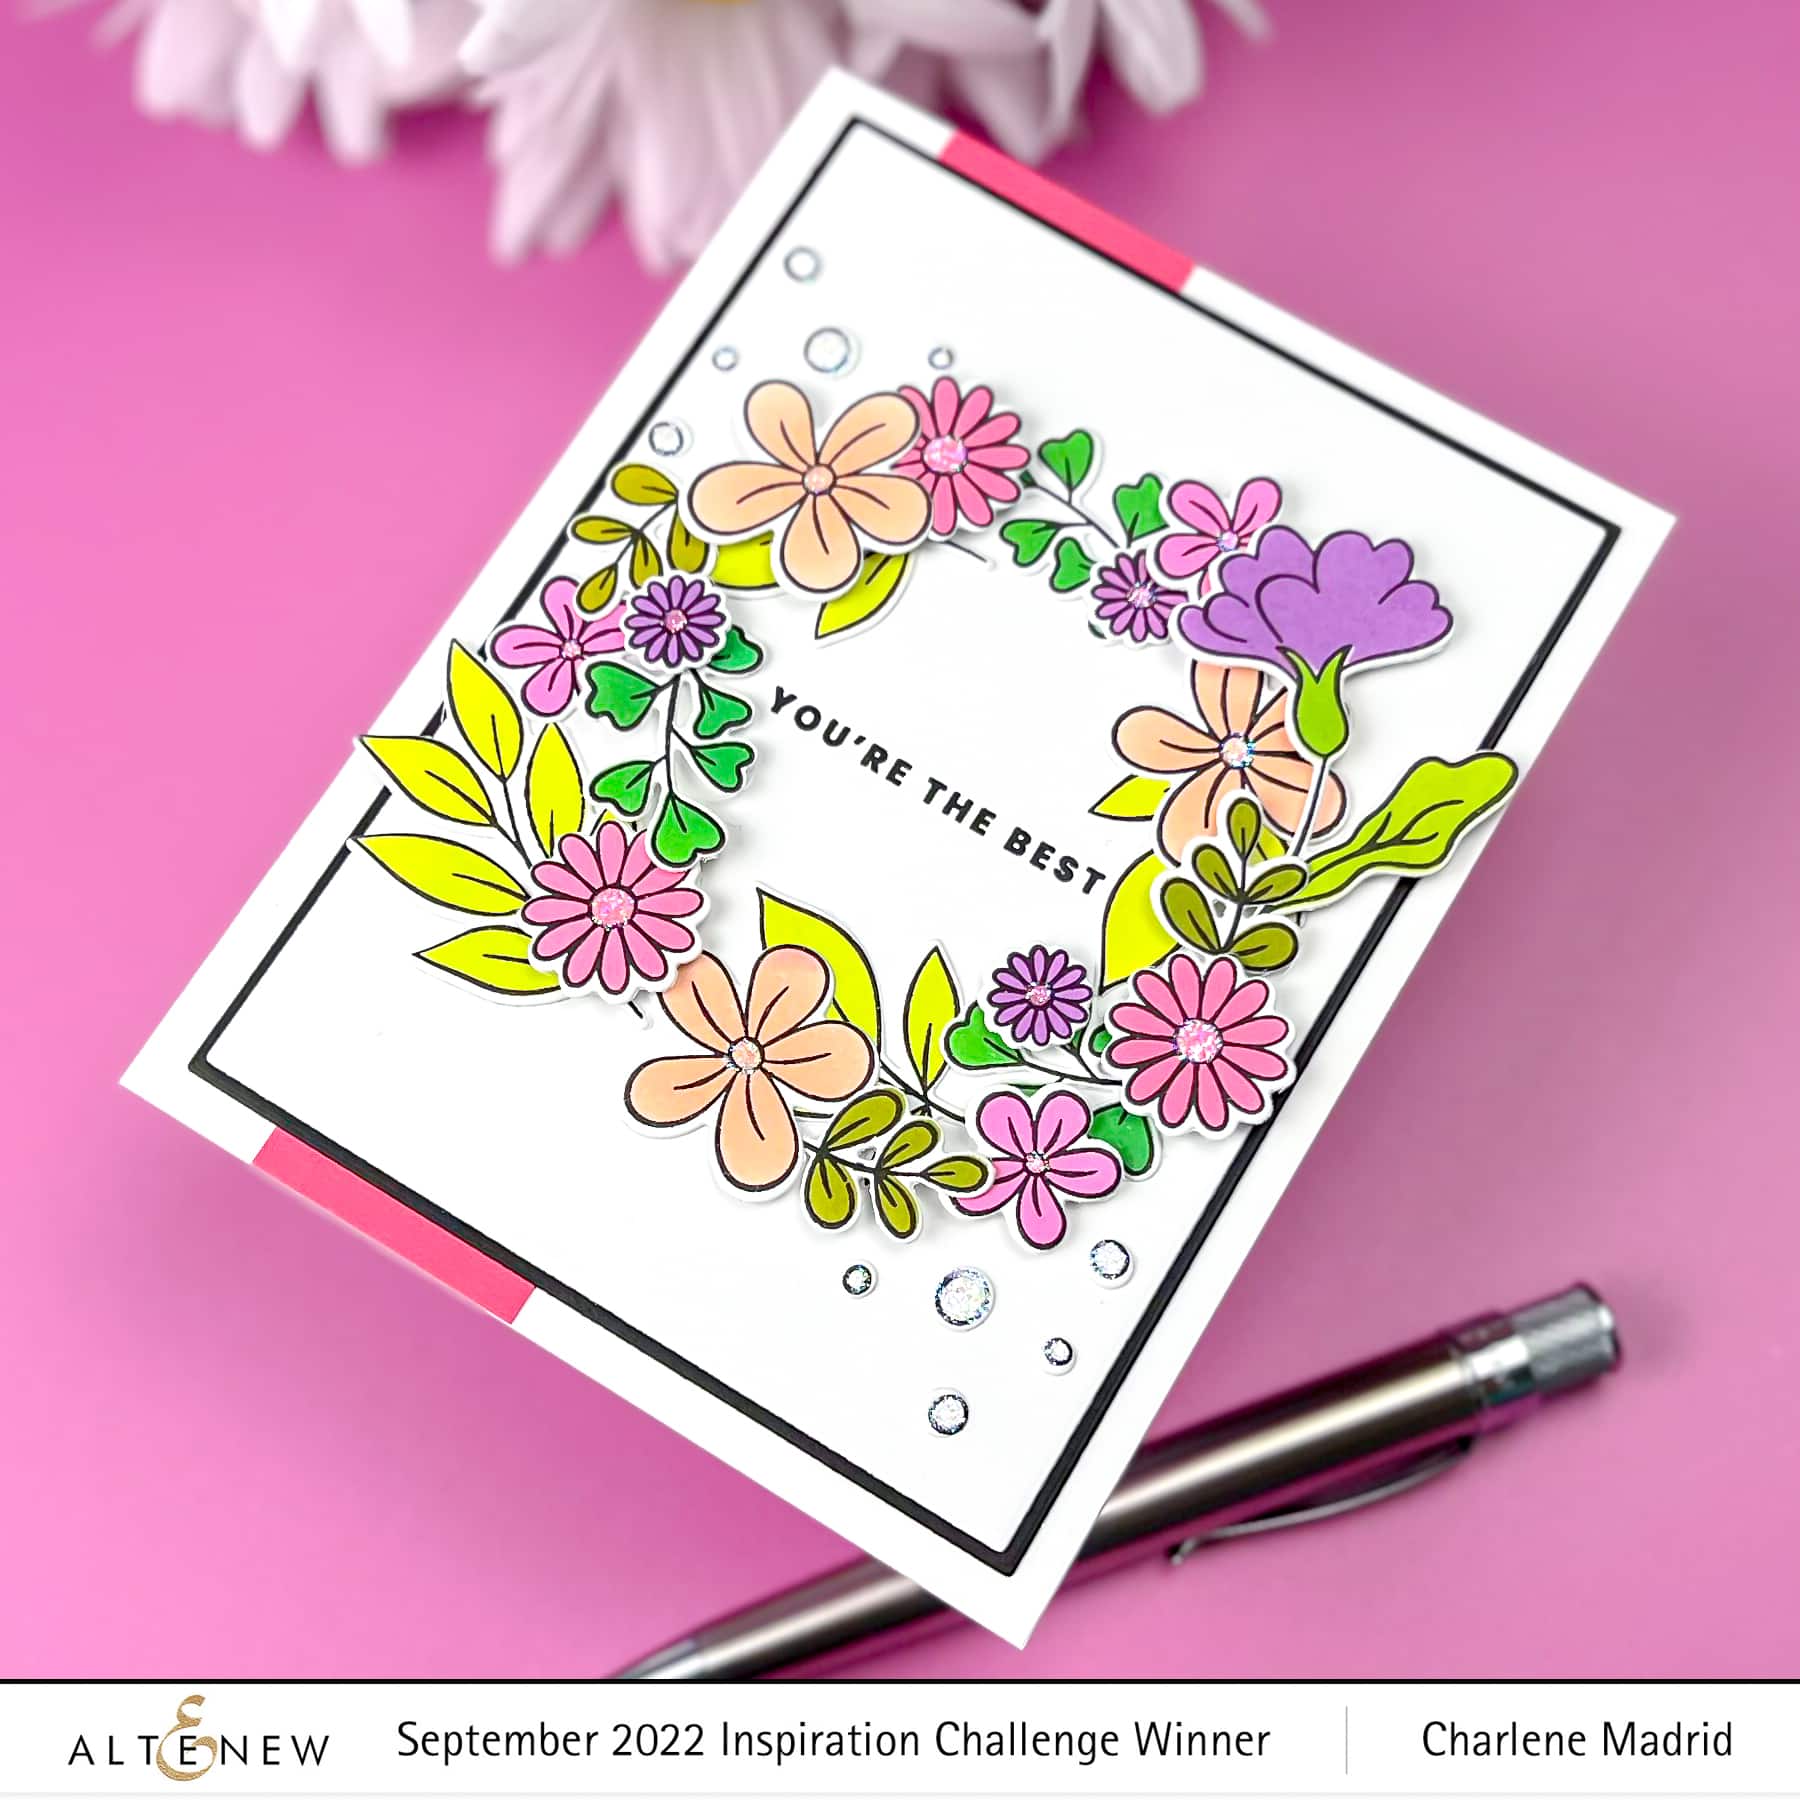
Card 2: Easy Wreath Building
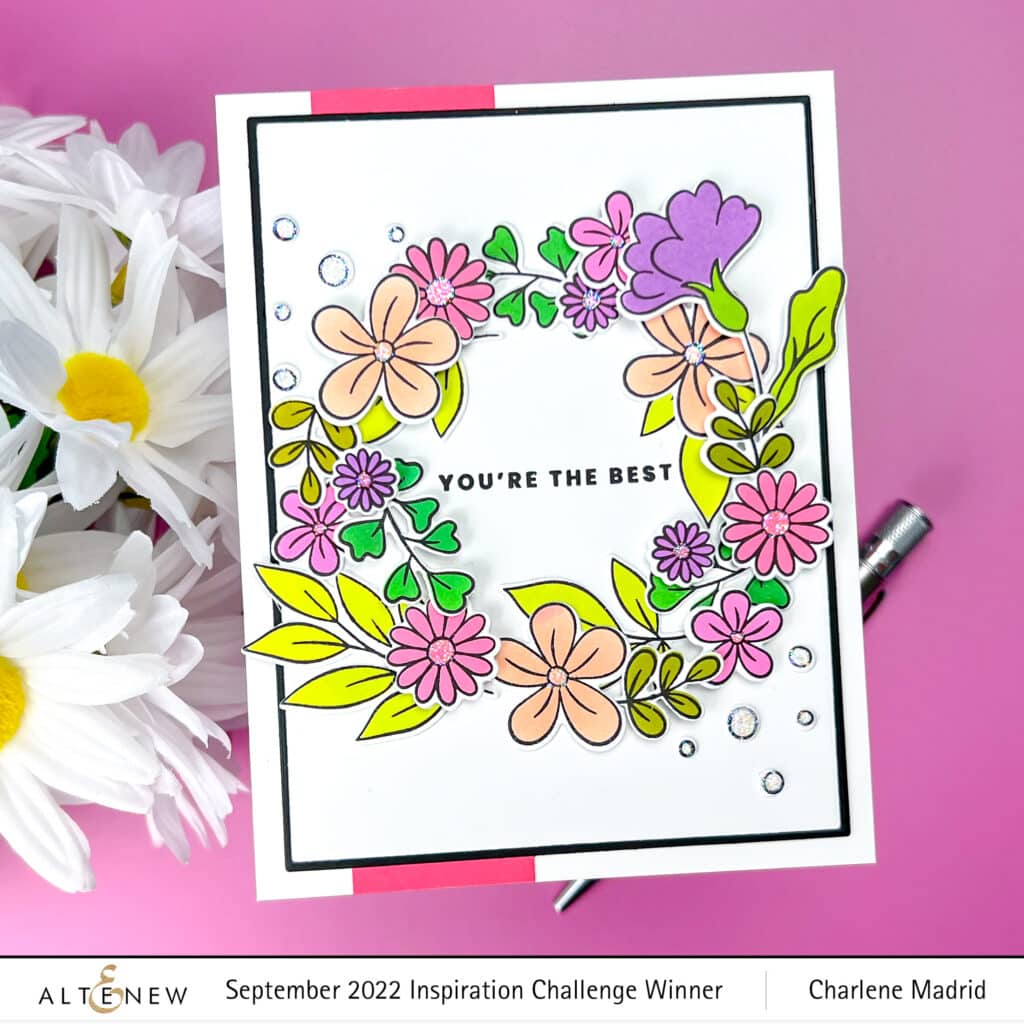
Did you know that Altenew offers online workshops? I recently finished Altenew’s Online Workshop: Polychromatic. The workshop is all about becoming confident with colors and color combos. For my class homework I decided to practice adding pops of color to a white background using the Craft Your Life Project Kit.
First, I stamped the Zero-Waste Flowery Pattern in black ink on white cardstock. I then colored in all of the images using the coordinating layering stencils. For the final detail layer, I used a palette knife to lightly apply glitter glue to the centers of all of the flowers and the small dots. This addition made the card very pretty and sparkly!
The most exciting part of creating this card was using the amazing die included in the Craft Your Life Project Kit! The die cuts out all of the stamped images in one go! I cannot get over just how easy it is to cut out all of the images.
Next, I stamped a sentiment in the center of a piece of white cardstock. I added a thin black matting layer before arranging all of the die cut images in a wreath shape and adhering them to the front of my card panel. To make things really pop, I added a strip of bright pink cardstock to the front of my card base before gluing the main card panel on top.
Tip
After you have arranged your die cuts, use Press’n Seal to pick up all of the die cuts at once so you can add adhesive to the back!
Supplies


Super duper fun!
Thanks, Erum!