Fall in Love with the It’s My Party Collection from Spellbinders
Stuck in a rut? Try one of these fun card designs!
Balloons have long been associated with joyous occasions and celebrations, and I am thrilled to share the new It’s My Party Collection from Spellbinders. This exciting range is designed to add a touch of whimsy and cheer to your crafting projects, making it perfect for any kind of celebration.
To help show the full potential of the It’s My Party Collection, I have created a video tutorial showcasing three different card designs. In this video, I will guide you step-by-step through the process of creating three delightful celebration cards using various elements from the collection. From stamping and foiling to stenciling and embossing, you’ll gain valuable insights and inspiration to create your own unique masterpieces. Happy crafting! ❤️
Disclosure
Compensated affiliate links may be used in this post at no cost to you. I received some of the products in this video/post at no cost. I will ONLY show you products from companies that I believe in and purchase from personally. Thank you for supporting me so that I can continue to bring you lots of fun crafting content!
Featured Products
- Party Balloon Garland Clear Stamp Set
- Balloon Garland & Sentiments Stencil
- Tiny Dots Embossing Folder
- Glimmering Poppin’ Birthday Hot Foil Plate & Die Set
- Floating Balloons 3D Embossing Folder
- For the full supply list, scroll down to the thumbnails at the end of this post.
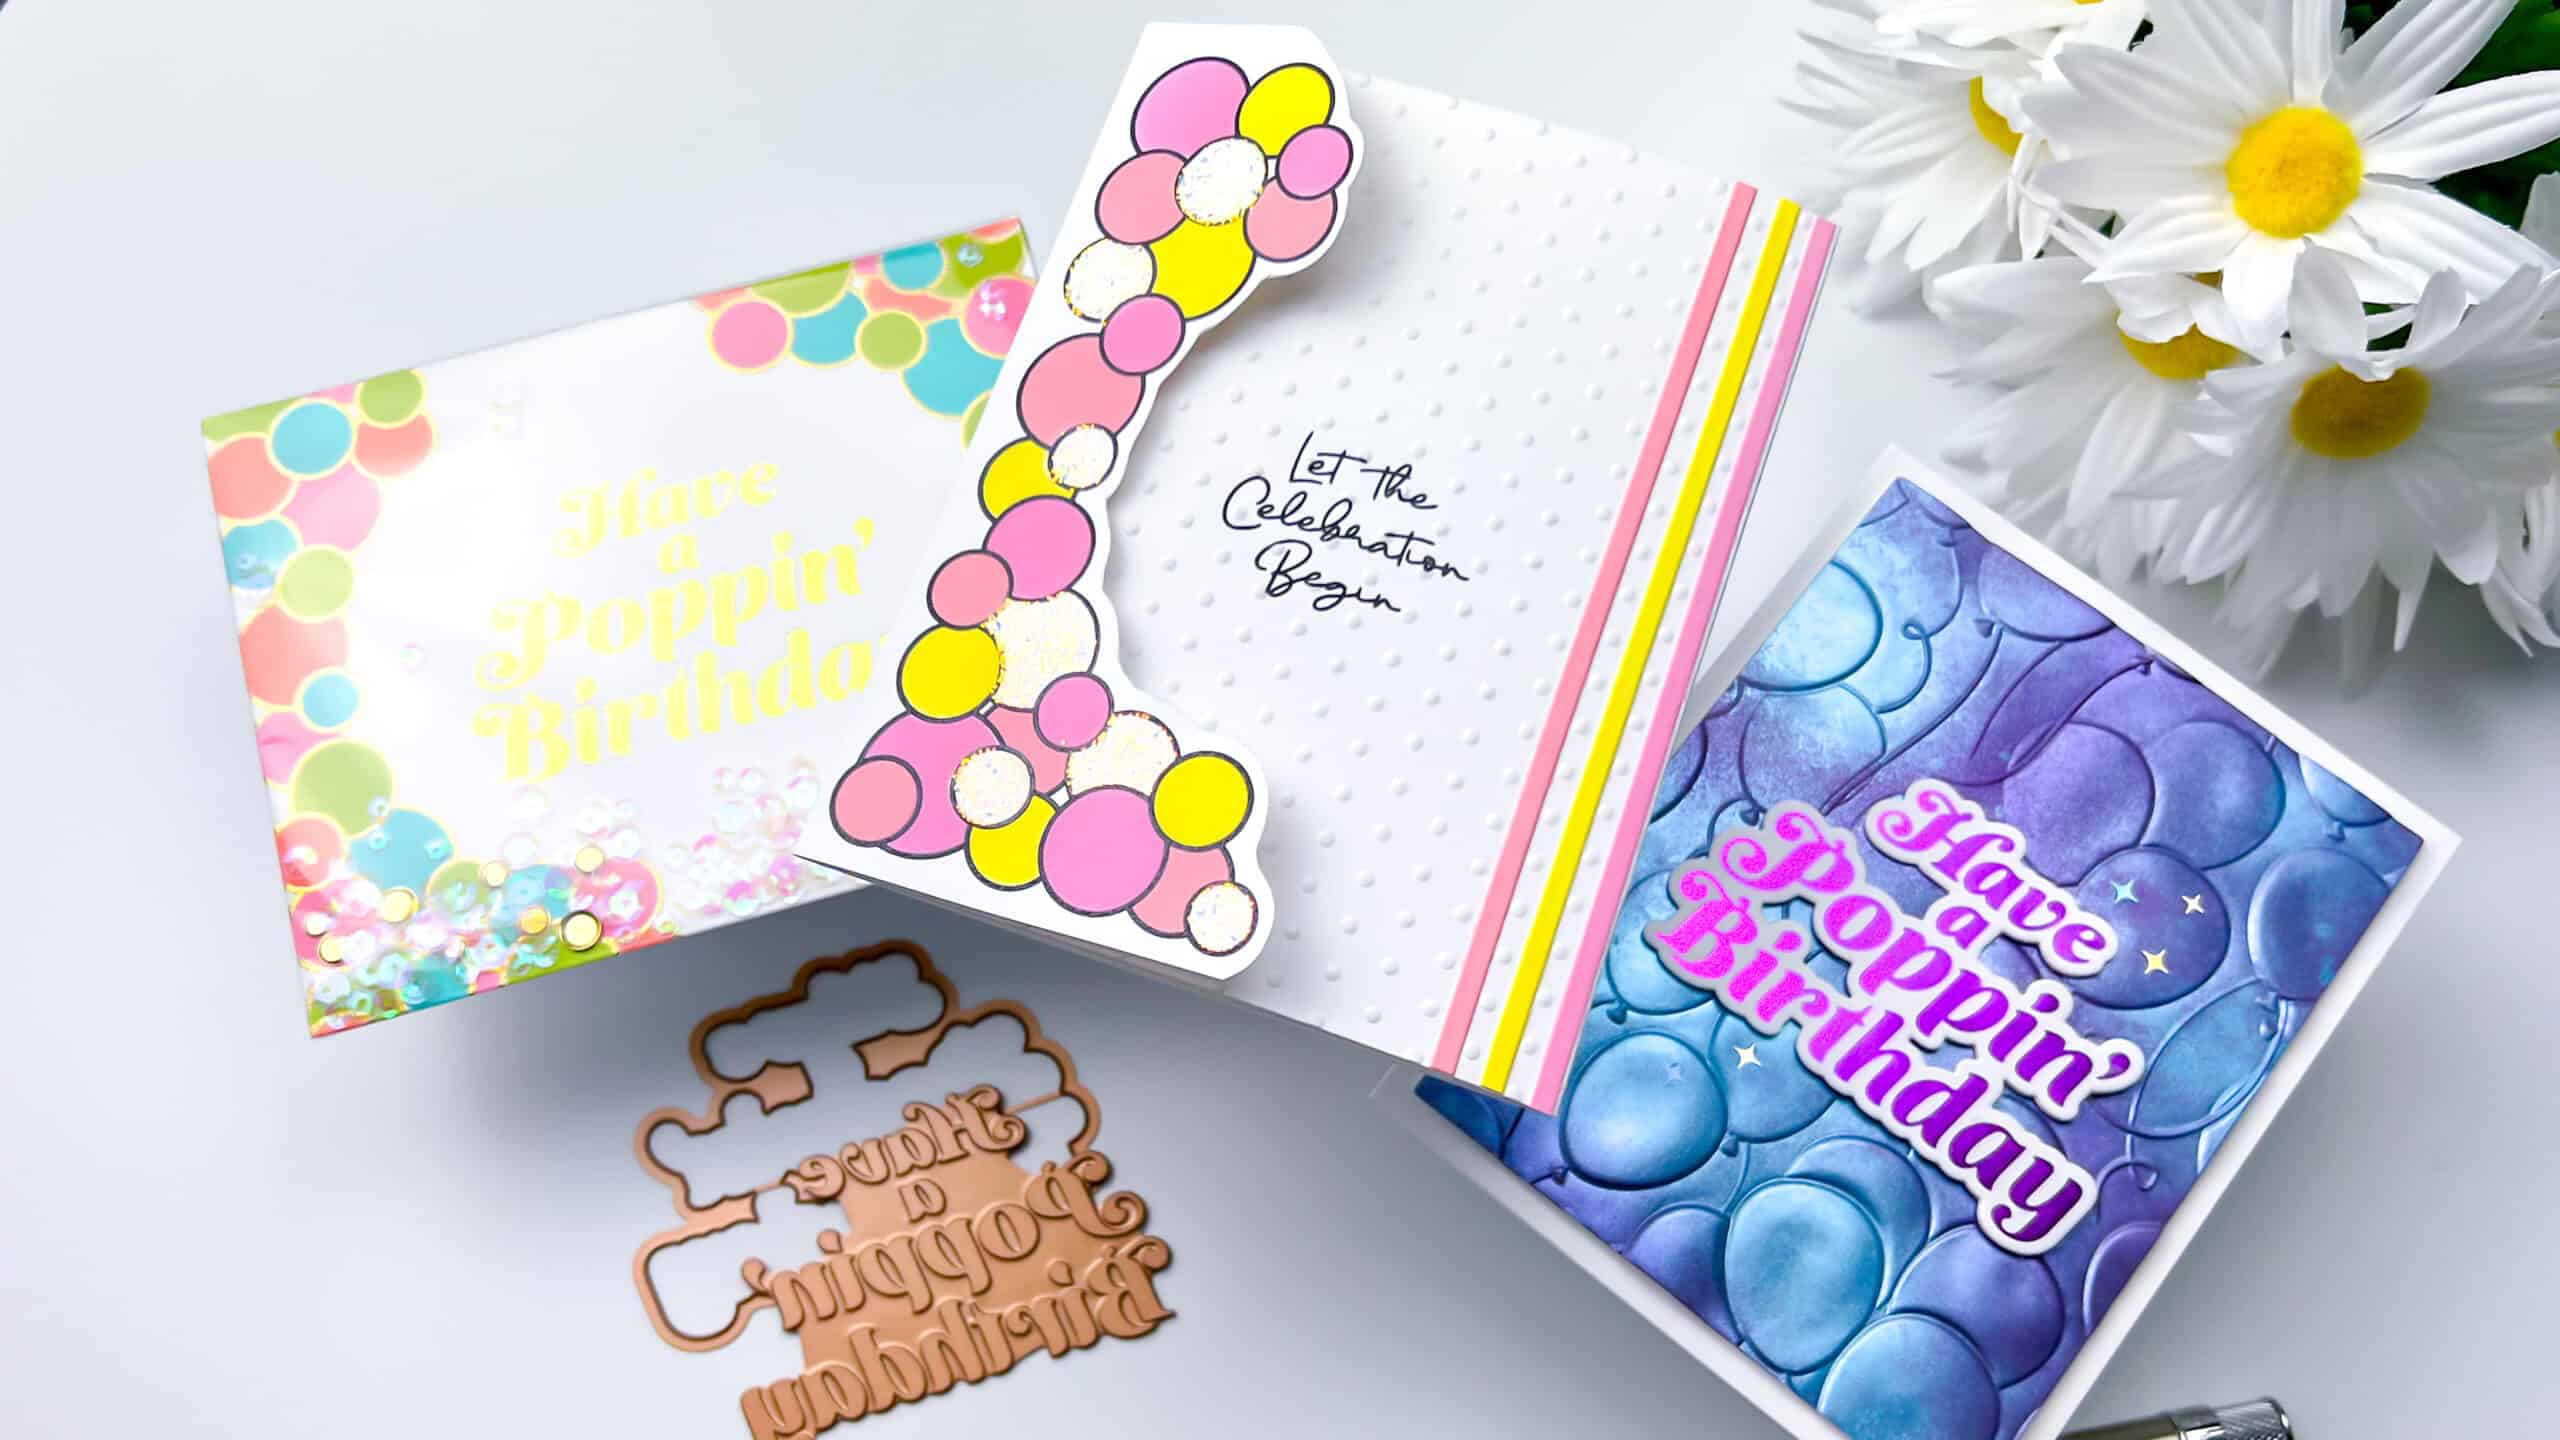
Card One: Tri-Fold with Detail Edge
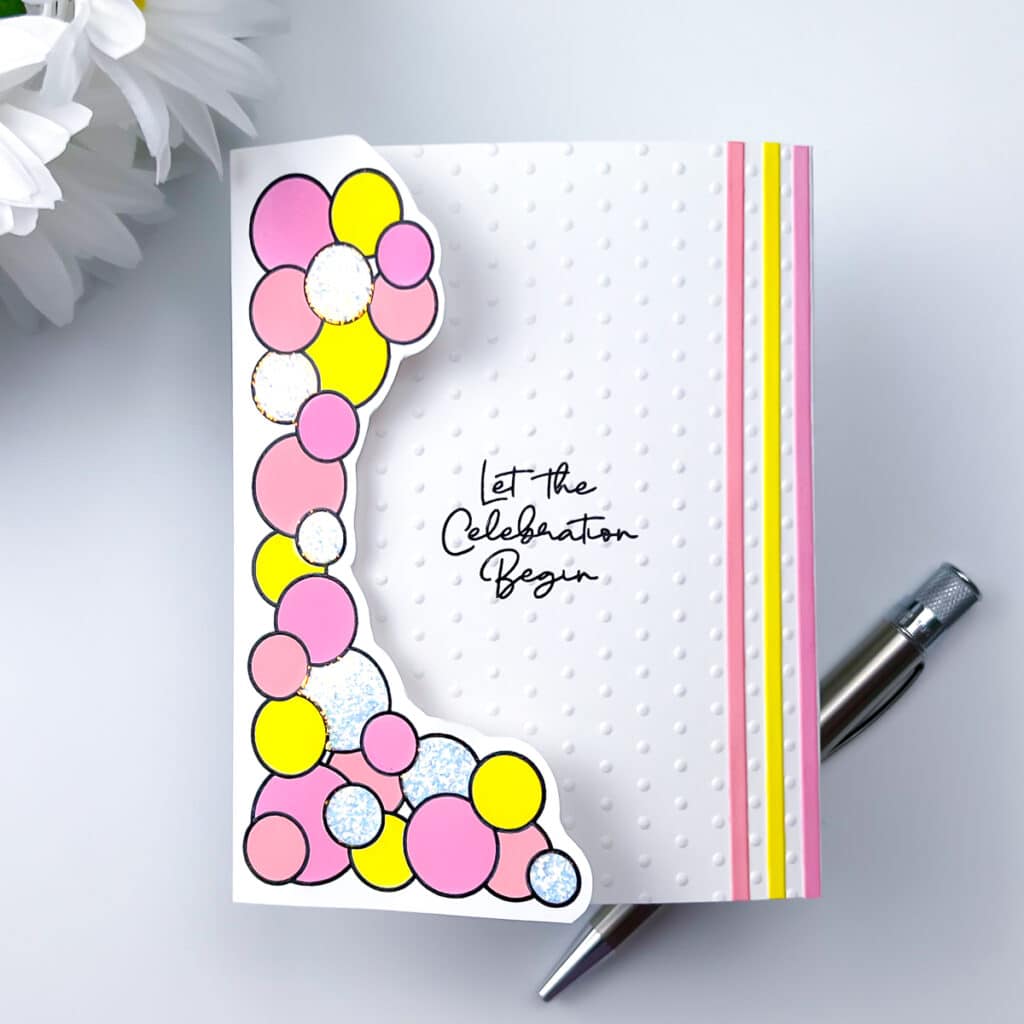
For my first card, I created a tri-fold card with detail edge. On the left flap of my tri-fold card, I stamped the adorable balloon garland stamp from the Party Balloon Garland Clear Stamp Set. Using the coordinating Balloon Garland & Sentiments Stencil, I colored the balloons with bright colors and added some sparkly glitter. The balloons instantly add a touch of whimsy and celebration to the design, setting a joyful tone for the card.
For the right flap of my card, I opted for the charming Tiny Dots Embossing Folder. I carefully inserted the flap into the embossing folder and ran it through a die-cutting machine, creating a mesmerizing pattern of tiny dots. This embossed texture adds a subtle yet delightful visual and tactile element, bringing the design to life.
Card Two: Easy to Mail Full Front Shaker
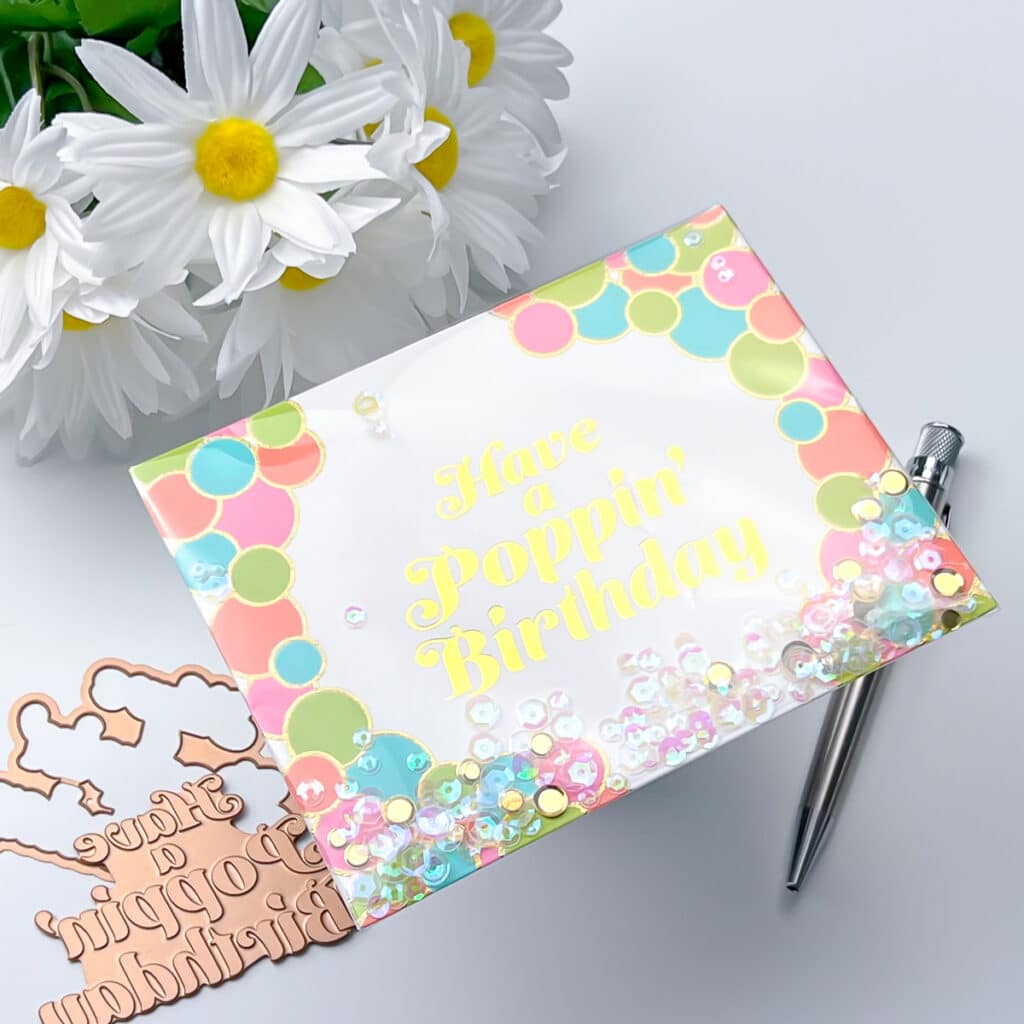
A full front shaker card is a fantastic way to create an interactive and attention-grabbing design. The shaker element adds an extra layer of fun and excitement to the card, making it perfect for celebratory occasions. As a bonus, they are easy to mail because the shaker element adds minimal bulk!
To frame the card and add a festive touch, I heat embossed the balloon garland stamp from the Party Balloon Garland Clear Stamp Set on both sides of the card. The heat embossing adds a touch of elegance and ties in with the Glimmering Poppin’ Birthday Hot Foil sentiment.
Card Three: Mica Stain with Embossing
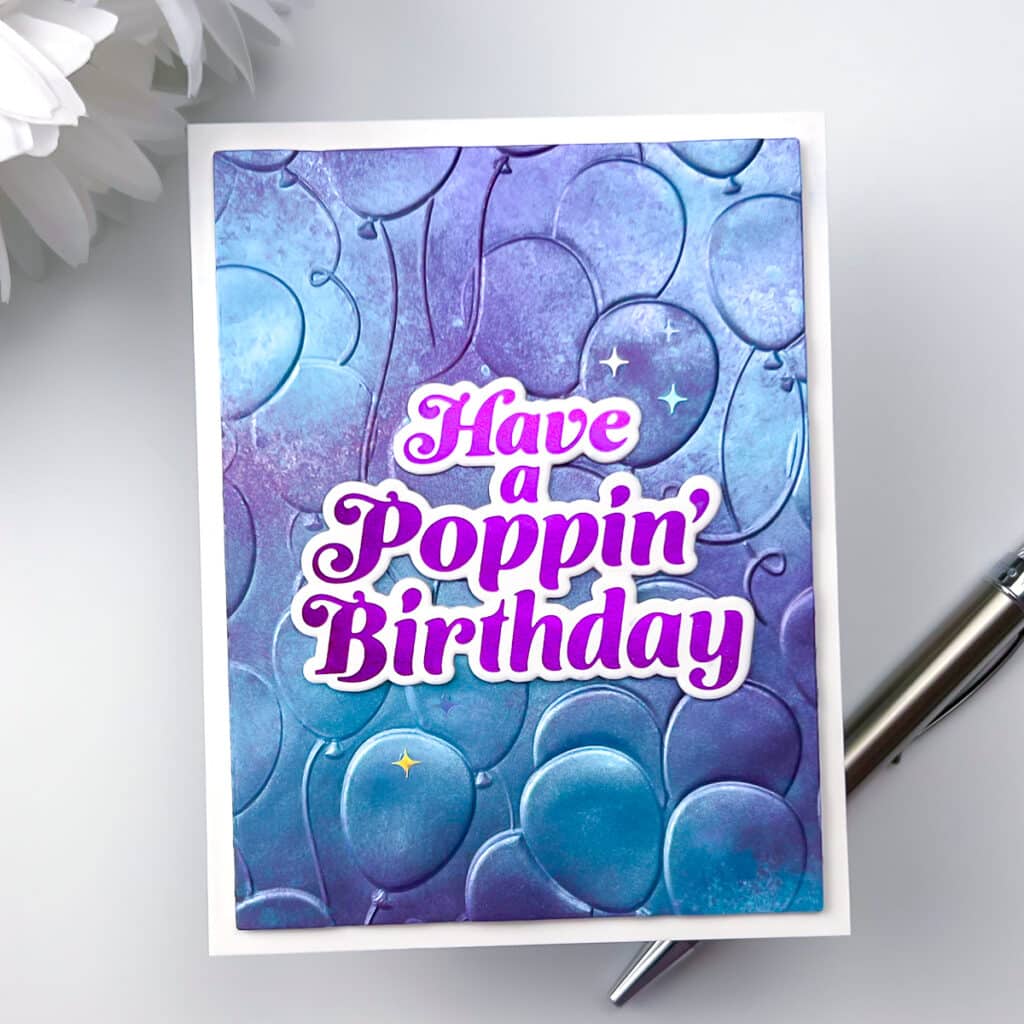
To add a dazzling touch to my third card, I began by spraying mica stains. Mica stains are shimmering pigments that lend a gorgeous sheen to any project. By carefully applying the mica stains onto the cardstock, I created a captivating and ethereal background that adds depth and visual interest to the design.
Once the mica stains dried, I embossed the card panel using the Floating Balloons 3D Embossing Folder. This embossed detail adds dimension and a celebratory vibe to the card. Then, to make a bold statement, I incorporated Glimmering Poppin’ Birthday Hot Foil sentiment on the front of the card.
With the combination of mica stains, embossed balloon panel, and a striking hot foiled sentiment, my third card using the It’s My Party Collection offers a unique and alluring design. The shimmering background, textured embossing, and the striking sentiment make it a standout piece for any celebratory occasion.
Supplies


